This is quick addenda to my previous post on the PST Import Service. Sometimes you can run in to an issue where the import service says it cannot find the PST files – something like ‘The PST could not be found in the storage account’.
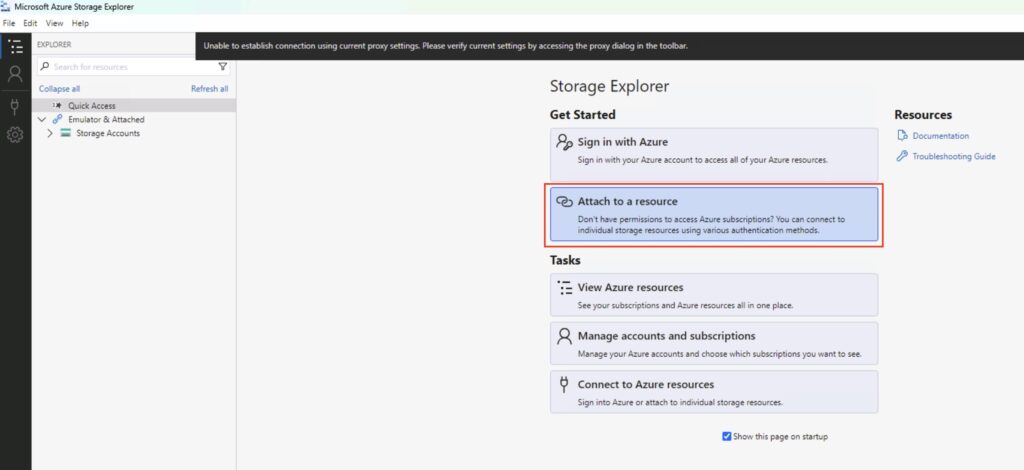
You can view the storage blob created during an import session – it’s a quick/handy way to be able to see why the import service is having the problem.
It’s pretty easy. Download and install the ‘Azure Storage Explorer’ from here:
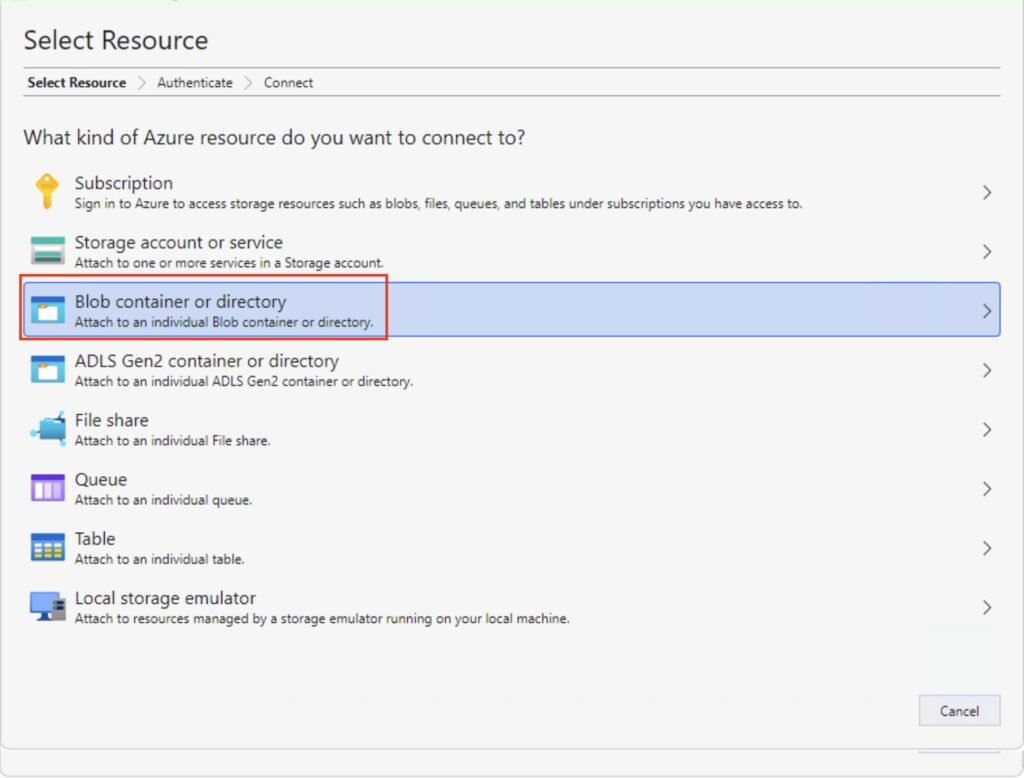
You now need to select ‘Blob container or directory’.
Select the blob
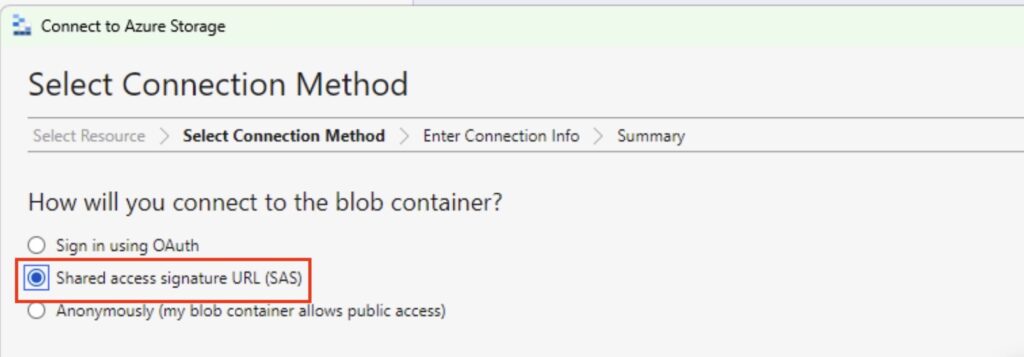
Next, select the ‘Shared Access Signature URL (SAS) option’:
SAS
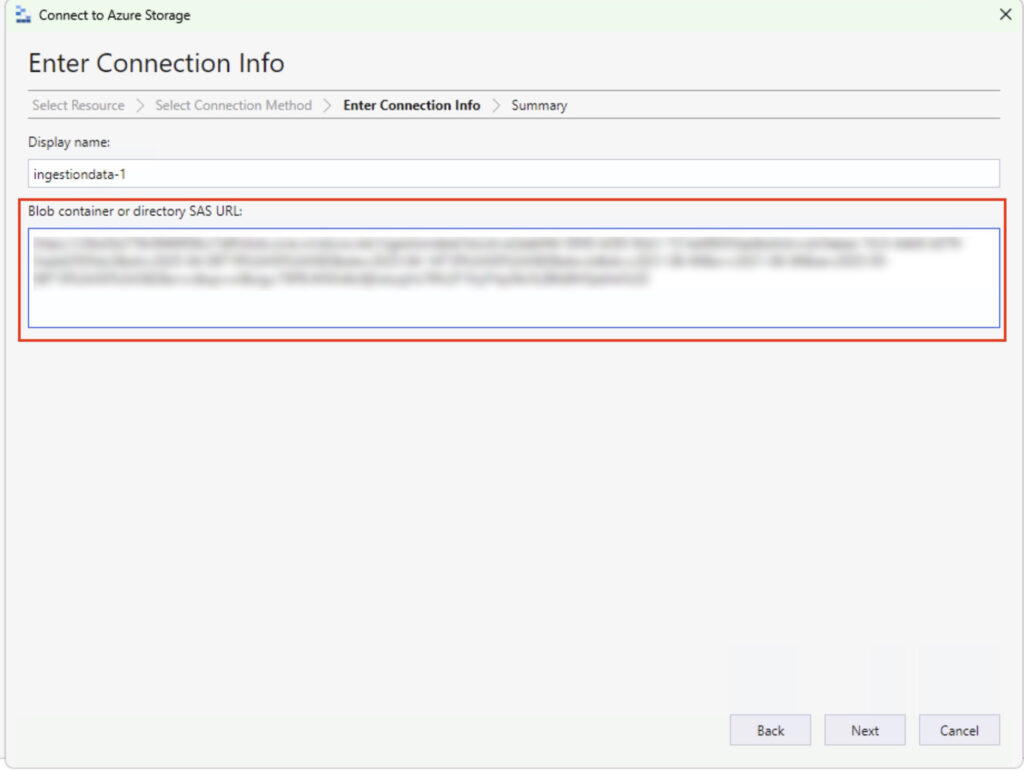
Now, paste in the HTTPS link to your blog – don’t worry about the display name, it will self populate:
Paste your blob
Click ‘Next’ and good things will probably happen. You’ll get a summary – which is good – followed by a ‘Connect’ button, which, if you’ve gotten things right, will also be a good thing:
Blob View
In the above you’ll see:
1: How I learned about the sub-folders meaning nothing works.
2: The PST files we have imported as part of this demo.
3: The PST file I’m currently running for an actual real person.
What the PST Import Service does is allow you to bulk-copy PST files to Azure and have Microsoft import those PST files to mailboxes – primary mailbox or to the online archives – to your mailboxes. It’s a very useful service, and I’ve lost track of how many times I’ve used it over the years. It’s also very easy to use – so let’s run through the process.
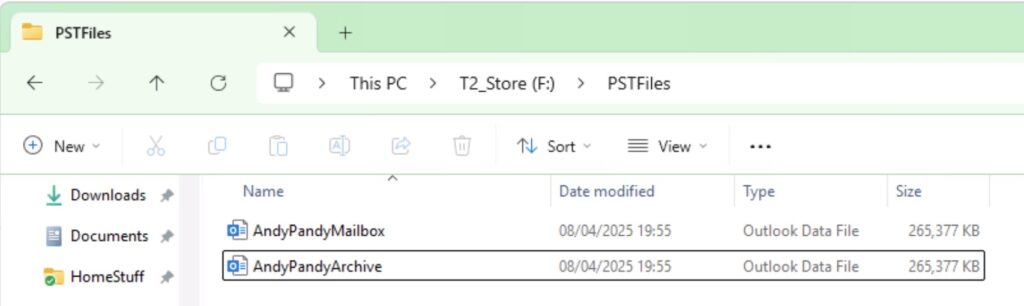
For the purposes of this demo I have a single user – Andy Pandy – and a couple of PST files. One I want land in his primary mailbox, and one I want to land in his archive:
PST files to import
You Need the Right Permissions!
This is a common issue when trying to use this service – the user you’re going to use for this must be assigned the Mailbox Import Export role in Exchange Online. What’s annoying is that while this is quick to add to a user, it’s slow to apply. You also need to be assigned the Mail Recipients role. By default, this role is assigned to the Organization Management and Recipient Management roles groups in Exchange Online.
I usually as an early on task create a role group that has the relevant rights – adding members to the group applies the permissions far faster than applying them to individual users.
Find the Import Service
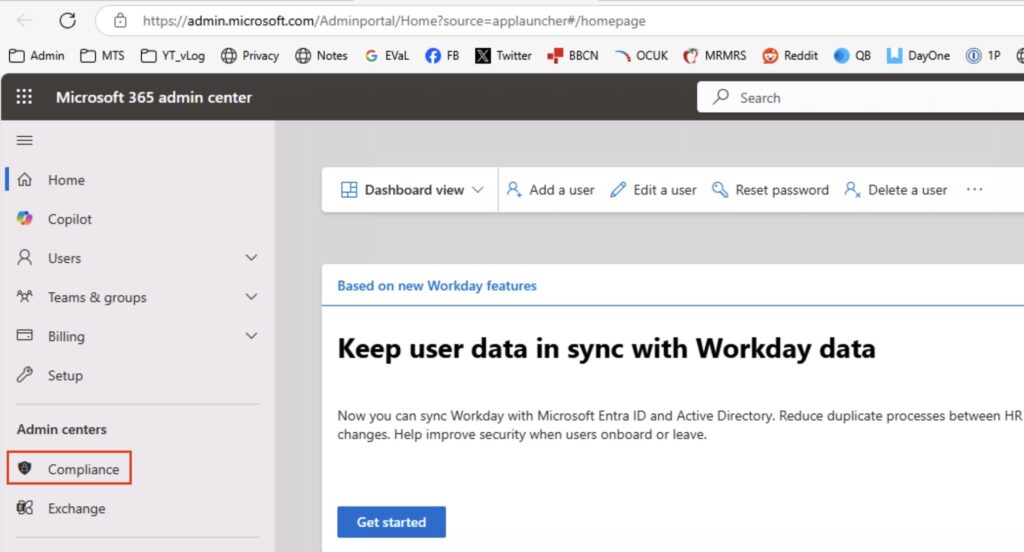
I’ll take you through the whole process. Firstly, logon to Microsoft 365, and go to the Admin Centre. You need the Compliance portal – or Purview.
Compliance Admin Center
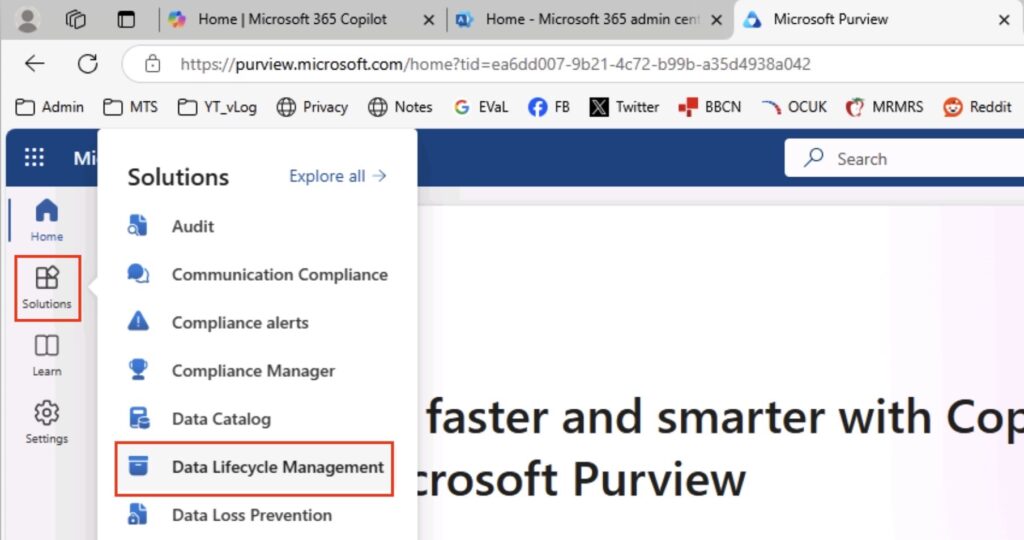
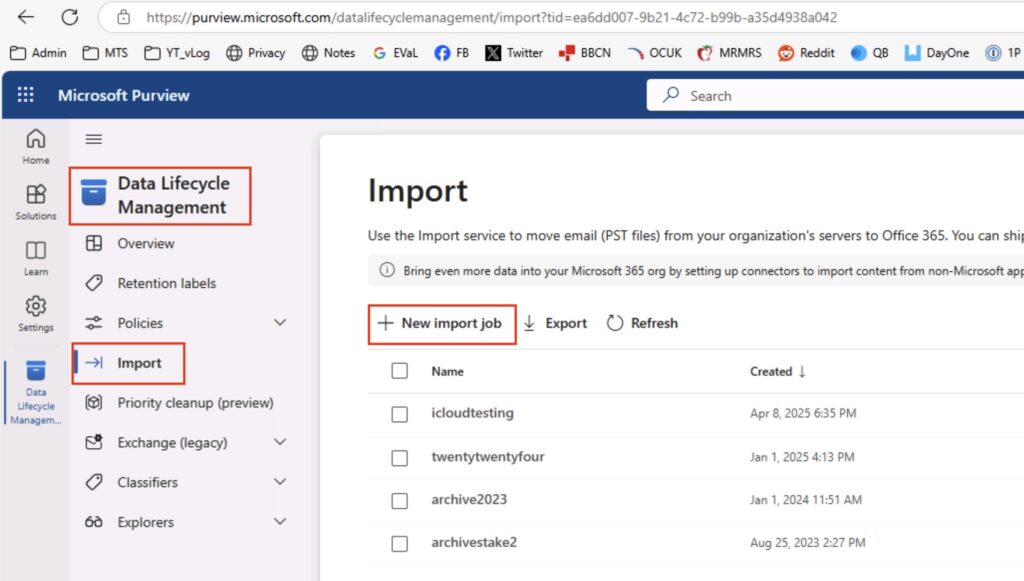
I’m going to assume that you’re using the new admin portal rather than the classic – the option is still easy to find in the classic portal however. The option you want to select is ‘Solutions’ in the left-hand menu bar, followed by ‘Data Lifecycle Management’.
Data Lifecycle Management
Create a new Import Job
In that area, you will now see on the left the option to select ‘Import’ – do that, and the ‘+’ next to the ‘New Import Job’ in the menu – we’re going to start an import. You’ll see that I have several jobs in there already.
DLM: Import Process
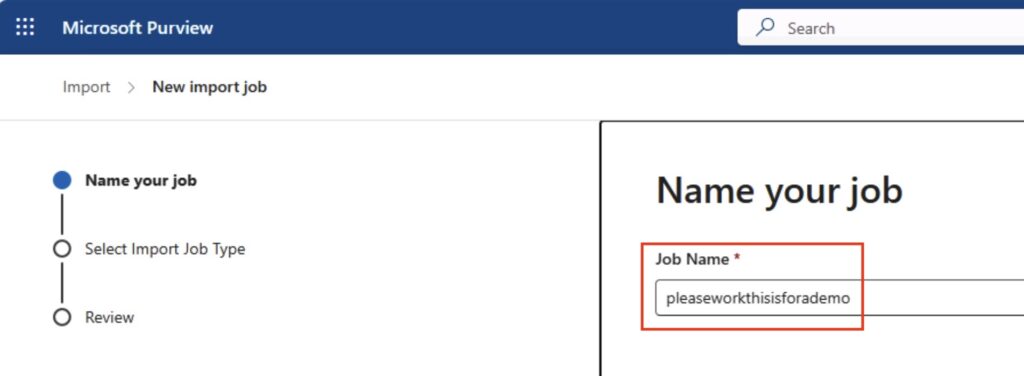
The first thing you will need to do is name your job. It’s quite fussy on the naming:
Job Name: 2-64 lowercase letters, numbers or hyphens, must start with a letter, no spaces
You can see that I have given mine a suitable demo name:
Name your job
Click ‘next’ right down the bottom of the screen – be careful with this, if you can’t see it, expand your browser window! It doesn’t always auto-scale, which can be irritating.
Selectyour import type
Next, we’re going to choose to upload our data. You can ship physical drives to Microsoft, however I’m not going to cover that process here. Select ‘Upload your data’, and click ‘next’ at the bottom.
Select your job type
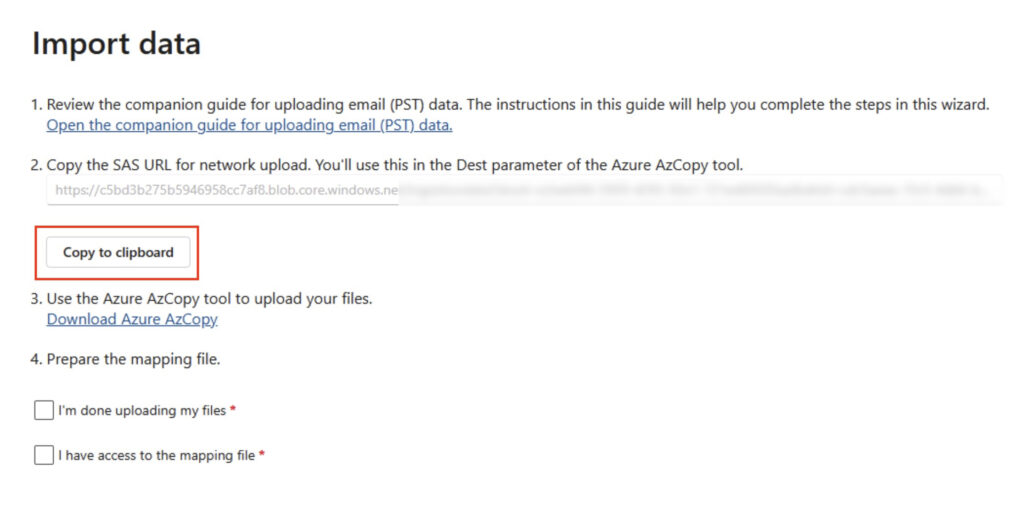
Import Data
This is the interesting bit, and it can be quite fussy so you must be accurate with this items!
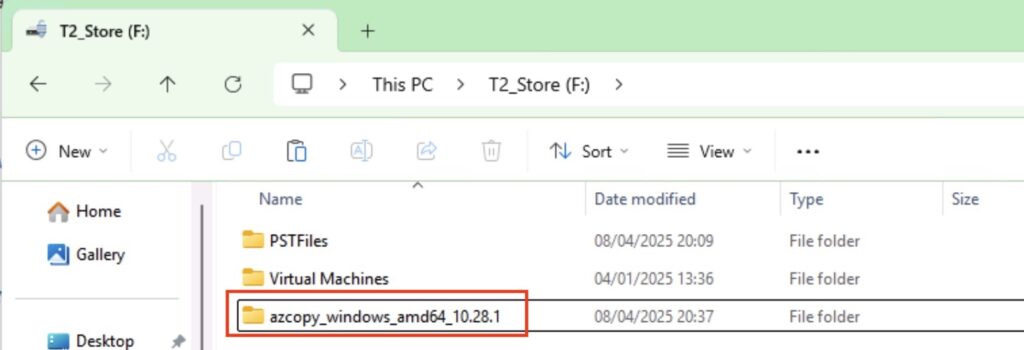
You will first need to download the ‘Azure AzCopy’ tool. You can get it here:
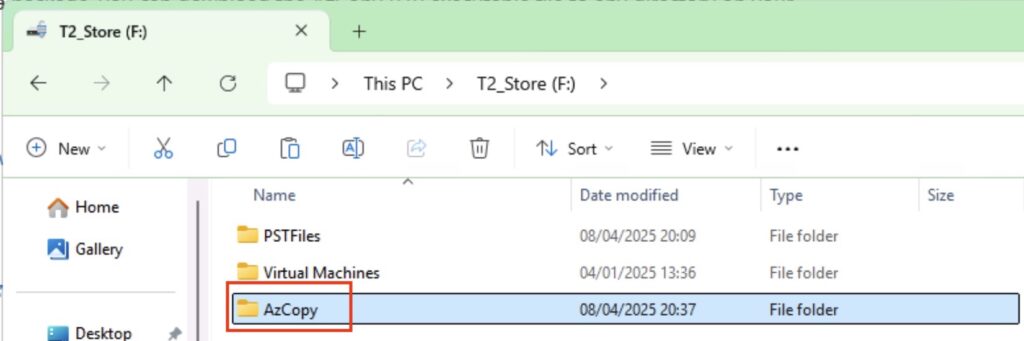
There are significant changes between earlier versions of AzCopy and later ones in terms of command line options, so I’m going to assume you have downloaded the latest version (as of 2025-04-08) and we’ll be using that. We’ll be doing this from the command line, so I tend to rename the directory after I’ve expanded it to make it easier – you can see below the original, and where I have renamed it:
AzCopy ModuleAzCopy Folder Renamed
Let’s Copy Our Data!
So let’s form our AzCopy command – fire up notepad as this may take you a couple of goes to get right ☺️ The command you want is:
NOTE: Make sure you put the target blob in quote – it often has syntax impacting characters in it that will cause you problems.
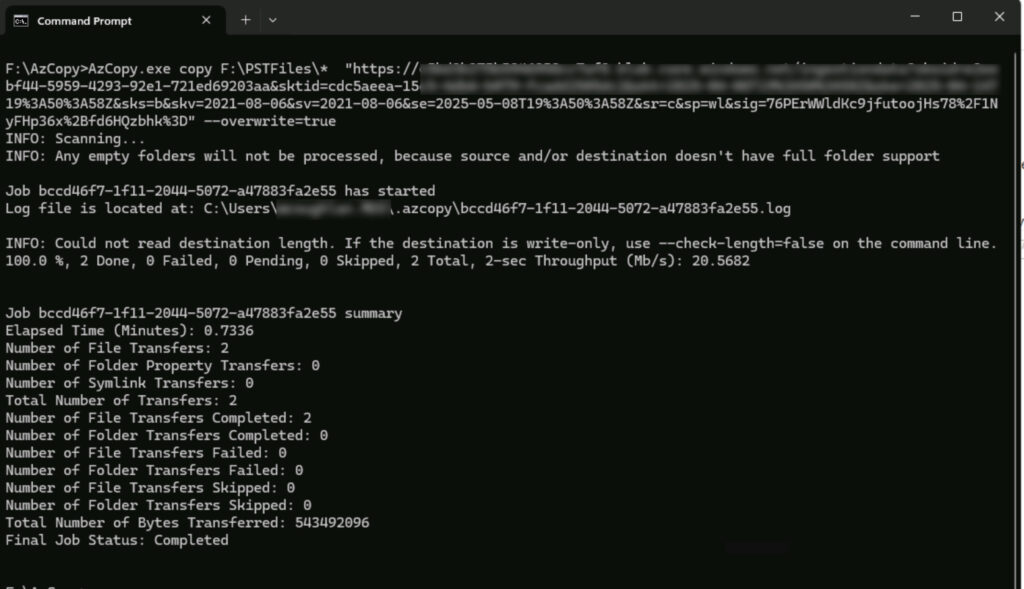
Let’s formulate the full command. What’s my ‘SourceDirectory’ – In my example, my PST files are in ‘F:\PSTFiles‘. So my source is ‘F:\PSTFiles\*“. The format with the trailing * is important! If you just do ‘F:\PSTFiles’ then you’ll end up with a folder called ‘PSTFiles’ and a complaint saying “the service cannot find your files – “The PST could not be found in the storage account” or similar.
Next, the ‘TargetBlob’. You get this by clicking on the ‘Show Network Upload SAS URL’:
SAS URL
After a moment or two, the URL will be generated, and you will see the option to copy the URL to the clipboard – do that, and paste it into Notepad.
SAS URL Copy to Clipboard
So we now have the source and the target, so let’s formulate our command based on:
I’ve randomised the blob, so don’t even think about it 🤓 The item on the end ensure files can be overwritten if you get the command wrong and nee do re-run. You can see why I suggested copying it into Notepad.
We now have our command, so let’s execute the copy. Fire up a DOS prompt, and go to the directory containing our AzCopy. Then, simply copy/paste in the command we have created above.
AzCopy Execution
Hopefully you’ll see your files have been copied, and at a decent throughput too! I can often exhaust my 1Gbps connection so it doesn’t appear to be highly throttled.
Prepare the Mapping File
Next, we need a CSV file that maps the various PST files to the right mailboxes and the location in that mailbox. You can download my example for this demo from here:
NOTE: Case is important for both the PST file and the Email Address. That second one surprised me – I don’t remember that being the case. I now copy the email from the Admin centre (for one or two accounts) or grab via PowerShell.
Mapping File
Upload the Mapping File
We have the mapping file, and we’re ready to continue. Select ‘I’m done uploading my files’ and ‘I have access to the mapping file’, followed by ‘Next’:
Ready to upload the mapping file
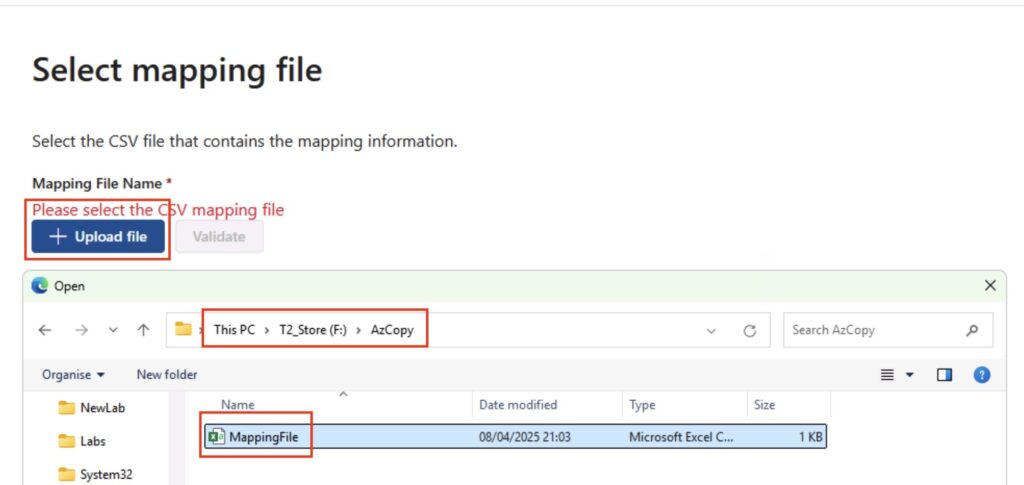
You will now be asked to upload your mapping file – hit that button, and select your mapping file:
Mapping File Upload
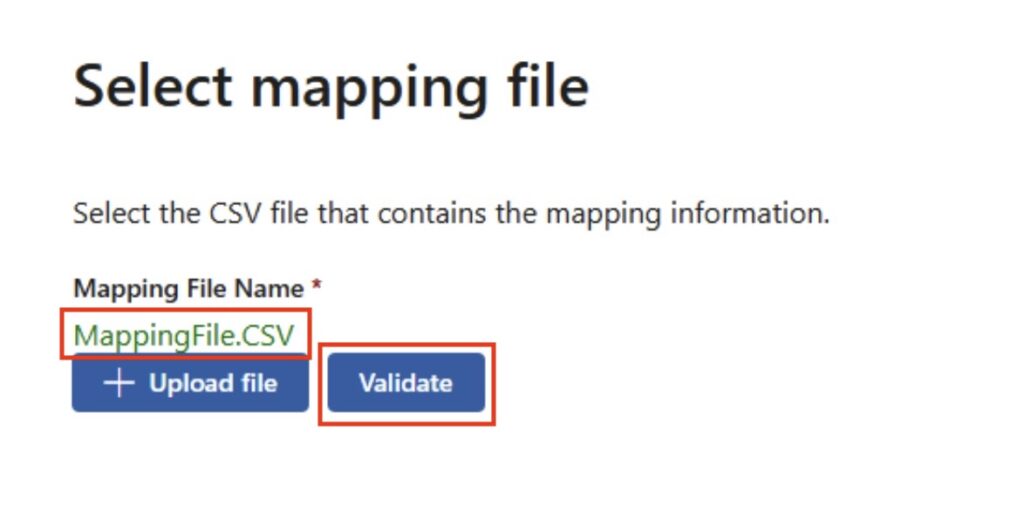
Once you have uploaded the mapping file, you will want to hit ‘Validate’ – it will check for common errors:
Mapping File Validation
Hopefully, your mapping file will show up green as in the above example. The most common error I see is ‘The PST could not be found in the storage account’ – this is because you’ve uploaded the directory, not the individual PSTs! Refer back to including the ‘*’ in the source path. You can of course include the path in the mapping file however I find that in itself can be quite fussy – stick everything in the root and you’ll be fine.
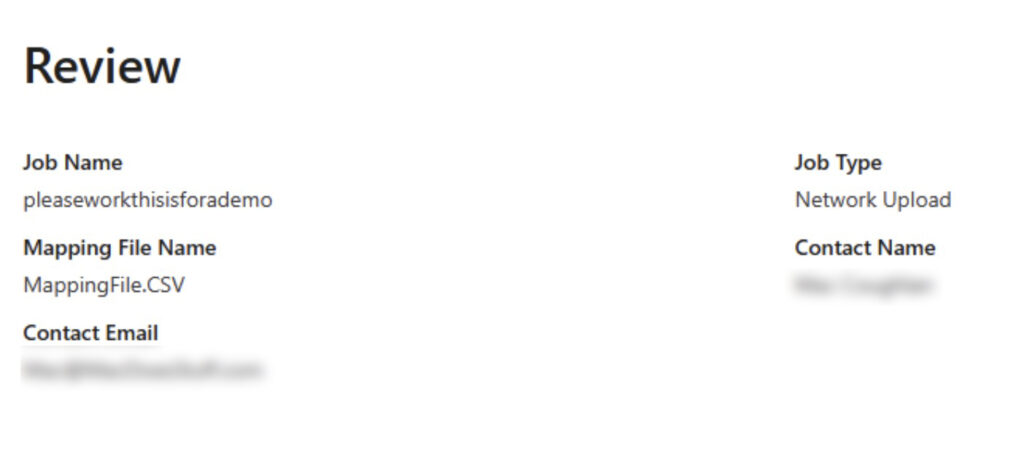
Assuming you’re all good – click ‘Next’. You will now receive a summary/review of the import job you have just created – you can click ‘Next’ on this one too, assuming everything looks OK.
Review of the import job
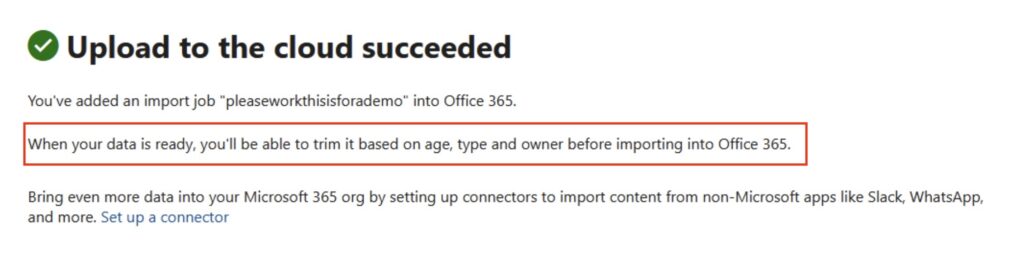
Click ‘Submit’ at the bottom. The Import Service will now examine the PST files – it has not yet started the importing!
Upload to the cloud succeeded
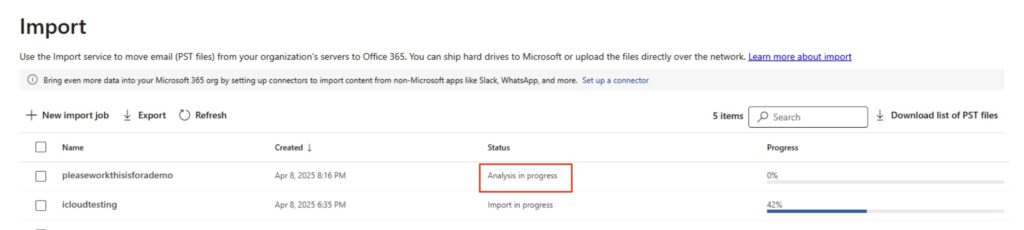
Click ‘Done’ and you will be taken back to the import screen – you will need to wait for the analysis phase of the import job to complete. Depending on the number of PST files and their size, this can take a little while.
Analysis in progress
Import Completed (Oh no it isn’t)
After a while, the import job will change to ‘Import Completed’ – don’t be fooled by this, the Import itself has NOT been done yet. Honest.
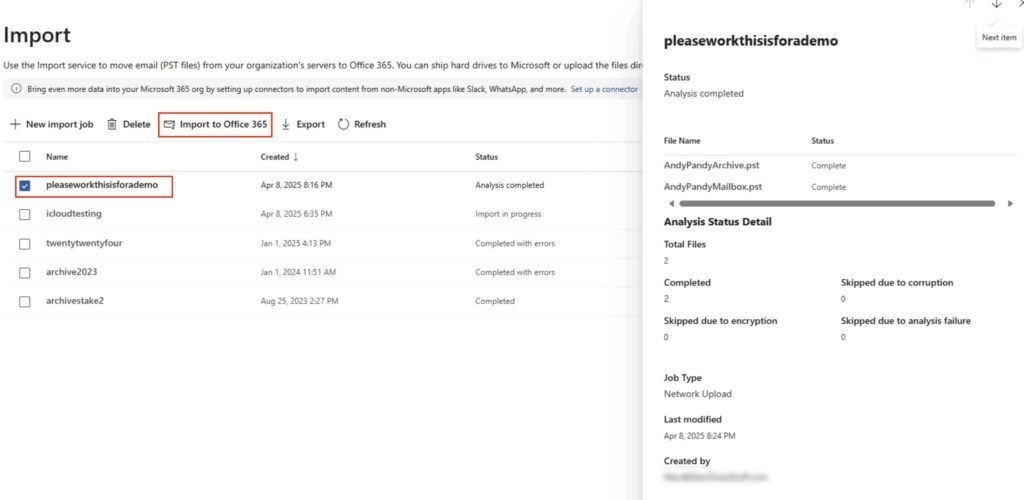
Import Analysis Completed
You want to select the job and make sure that the files have completed – none have been skipped etc. When you’re happy, hit that ‘Import to Office 365’ button. Interesting given it’s just said the import is done, right?
Import State
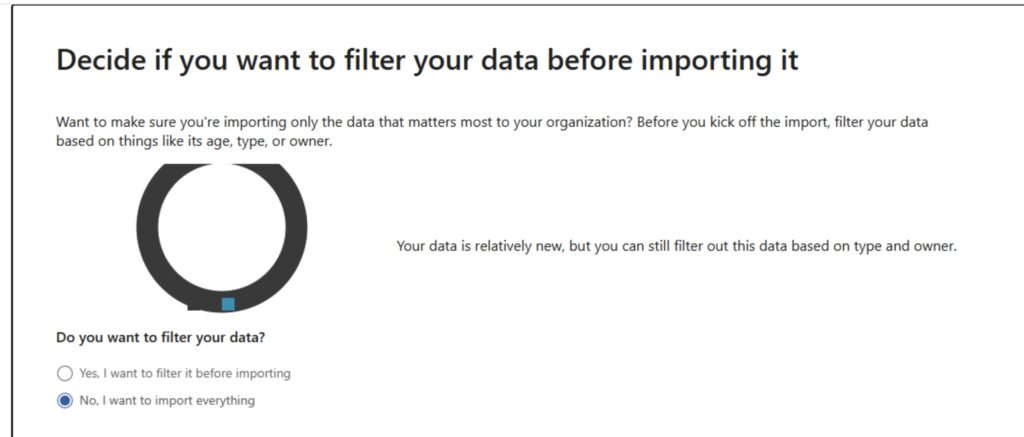
Filter Data
You can now, if you wish, filter the data. I’m not going to for the purpose of this demo however you can say for example to not import data over 2 years old.
Filter your data
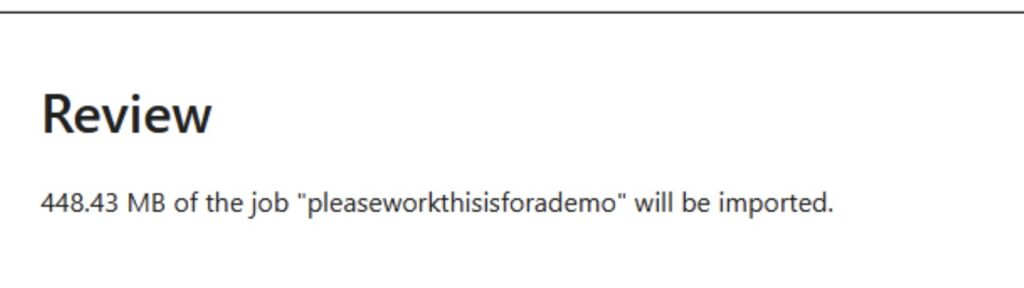
Click ‘next’ after you have selected the right option for you. You’ll now be told what the import job is going to do.
Review of import
See now the cool stuff can start. Hit ‘Submit’ and hopefully off it will go!
Derp
Hopefully, off it goes! Once the job is going properly, you can monitor its progress:
Derp
How Fast Is It?
I find it sometimes difficult to fully ascertain overall ingestion performance for Microsoft 365. Trying to keep up with the developing throttling situation is sometimes challenging. Saying that, you can carry out some reasonable guesswork.
I typically see about 20-30GB/day ingestion rates per mailbox, which is fairly decent.
Common Gotchas?
There’s the permission thing I mentioned at the beginning – it’s an irritant realising you need to do this only to realise you have to wait a while for the permissions to apply.
Message Sizing
There’s a 150MB message size limit in Exchange Online – you cannot therefore import messages that are larger than 150MB.
The Online Archive
The Online Archive initially is 50GB or 100GB, however it can auto-expand up to 1.5TB. There are several things to consider around auto-expanding archives however the most relevant one to this conversation is around ingestion rate – the fast ingestion rate only works up to the 50GB or 100GB limit (I.e., whatever the license limit is that you have). Beyond that, you’re relying on the auto-expanding process and that’s limited to circa 1GB/day. Also, in my experience, the Import Service fails when it hits that auto-expanding limit. I’d investigate other options if that’s your use case.
As a quick side-note, if you have complex migration requirements – multi-terabyte mailboxes, Symantec eVault migrations etc. – one of my favourite vendors is Cloudficient. They have some very cool technology to deal with these complex scenarios.
Summary
It seems a complex process when I write all this down – it really isn’t however. Like I say, I use this process a lot. Make sure you’re fussy on case etc. and you’ll find this a really useful tool.
Obviously change the ’emailaddress@domain.com’ to whatever you’re looking for. You can use wildcards too, so for example DA*@contoso.com would find any alias beginning with DA and @contoso.com
The company I currently work for is in love with Email. Lots and lots of it. In fact, I’m fairly sure it’s their goal to deliver all the email everywhere.
Anyway, a side effect of this is that often you know you have some information, from someone, somewhere, about something and it’s hard to track it down.
Sure, Outlook has search, but hell you can never find anything, right? Well, having watched some people use the Outlook search I can understand why they can never find anything – I suspect people don’t realise exactly how powerful Outlook search is. There are great and simple ways to narrow the scope of your Email searches making it far, far easier to find the stuff you want.
Simple things like AND and OR. Search for Andy Pandy for example and Outlook will search for messages that contain:
Andy OR Pandy – and not in that order either. So emails with Pandy Andy will also show up.
It’s the most common misunderstanding of Outlook search I see, and why people can’t find things. If you wanted something that contained Andy AND Pandy you could search for:
Andy AND Pandy
…or search for emails with Andy in, but not Pandy. Guess how we do that?
Andy NOT Pandy
You can also of course search for the explicit phrase by searching for “Andy Pandy” (I.e. In quotes).
There are also some far more powerful search methods such as:
From: Emails from that person. Hasattachment:Yes Only emails that have an attachment. Attachments:attachmentname Only emails with that specific attachment – very useful Received:=date Items only received on that day Received:yesterday Take a guess on that? Also tomorrow/today… Received:last week …wild stab in the dark?
You can of course combine all of them – let’s imagine we want to find an email from Andy.Pandy@contoso.com, that has an attachment, and you received it last week. Well, you could search for:
You can see a video run through of how it works, and why it’s so cool, below. This was produced by Webucator, they produce a number of Microsoft Outlook Online and Onsite Training Classes. Must admit I do like video run throughs of stuff – it makes things so much easier to, well, visualise. Always find quite astonishing when some companies ban things like YouTube – how many people now when they want to know how to do stuff would immediately turn to YouTube? I know I do.