Storing Dropbox on an Encrypted Volume
28/02/13 08:38 Filed in: Apple
Outlines a process for ensuring that Dropbox storage is held on an encrypted disk image. Useful for laptop storage for example, where you want to ensure your data is protected.
====
Dropbox is a brilliant utility for synchronising files & folders across multiple devices. As the saying goes - it just works. One of the queries that comes up from time to time though is how can you encrypt the dropbox folder? For example, if you’re running Dropbox on a laptop, you may want to encrypt the Dropbox storage but not encrypt the whole drive. Why would you not want to encrypt the whole drive? Well, full drive encryption can slow down SSDs for example, as every sector of the drive is written to. Or you may have applications that are either incompatible or have their performance impacted when running from an encrypted volume.
We are going to encrypt the storage of the Dropbox folder by:
- Creating an encrypted disk image
- Relocating/redirecting the Dropbox storage folder to the Encrypted Image
- Have the image auto-mount at logon
Create an Encrypted Disk Image
The first thing we are going to do, is to create a mountable disk image and ensure it is encrypted. This is natively supported in OSX, and easy to do. Firstly, fire up Disk Utility. This is in the Utilities folder under Applications, or you can use Spotlight to find it. Once you’ve started it, you should see something similar to this screen:
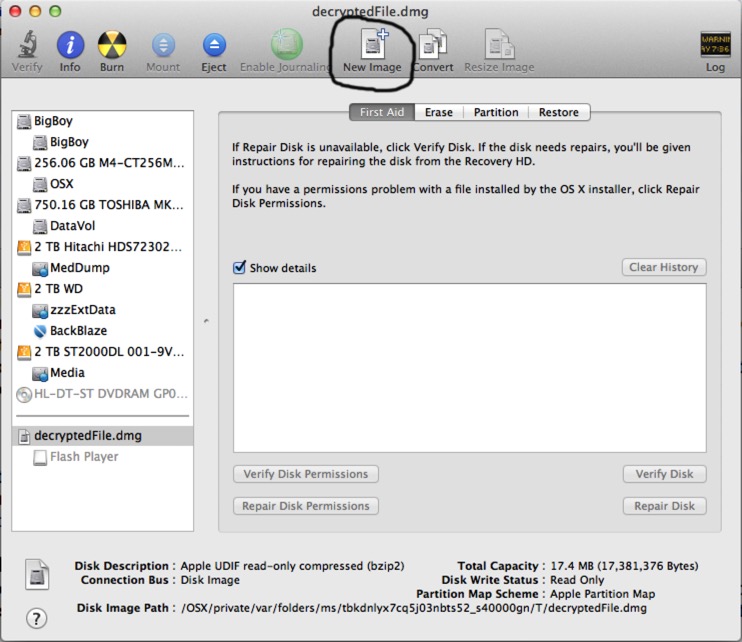
At the top of the utility, click the ‘New Image’, as circled. You will see a screen where you can outline the details of the image you wish to create - here’s mine:

You want to:
- Save the image somewhere appropriate - I have a folder called ‘Images’ for example.
- Change the size so that it’s large enough to accommodate your DropBox contents. Mine is set to 5Gb (via the ‘Custom’ option).
- Set the Encryption level; I have selected the most secure 256-bit AES encryption.
- Change the image format; I have selected sparse disk image. This grows as the volume is filled with data. If you selected ‘Read/Write Image’ then the whole 5Gb would be allocated as the image was created. This is just as viable an option.
Hit the ‘Create’ and you will be prompted for a key to be used as the encryption root for the disk image. Make sure you use a complex password, and make sure you don’t forget your password. If you do, all the data on the image will be gone:
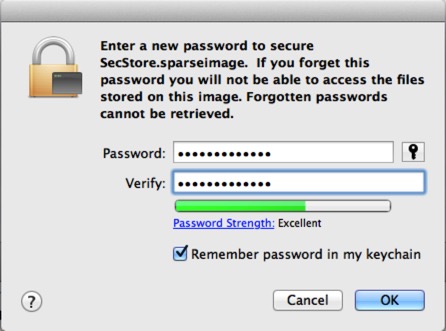
The utility will give you an indication of how ‘strong’ your encryption key/password is. Once you click OK, the system will go off and create your image for you. Note this can take a little while if you have a big disk image to create.
Once it’s finished, you should see your image mounted in Finder:
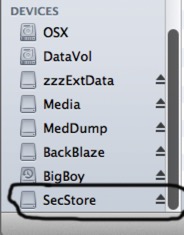
Great, so we now have an Encrypted storage volume.
Redirecting the Dropbox Storage
If you have Dropbox installed already, you will need to remove your Dropbox folder as we will be replacing it with a Symbolic Link. Make sure you back-up your data! This should be a non-destructive process on your Dropbox store, but hey, things do go wrong sometimes don’t they?
We are going to assume that you have your Dropbox folder under your home drive - if you don’t, you may have to adjust these commands accordingly.
We are going to:
- Quit Dropbox
- Unlink Dropbox from your computer
- Create a link to Dropbox that redirects to the Secure Image
- Re-Start Dropbox
So, the first thing to do is to make sure Dropbox isn’t running. Click on the icon in the task-bar, and select ‘Quit Dropbox’.
Unlink Dropbox from your Computer
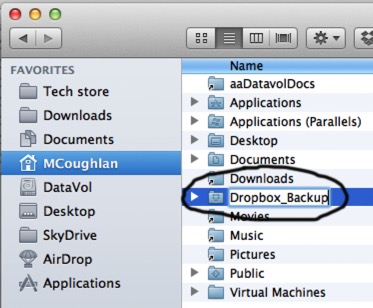
Make sure you have backed-up your Dropbox folder contents at this point. Go into Finder, and rename your Dropbox folder to something like ‘Dropbox Backup’ - renaming ensures we’ve kept your data as a backup.
Next, fire up Dropbox (from Applications, or use Spotlight), and you’ll see a message stating your folder has gone (quite rightly, we’ve renamed it). Click the ‘Relink’ button and you will be asked to confirm you want to unlink the computer:

Click OK, and Dropbox will return you to the initial setup screen. At this point quit dropbox again from the task bar.
Terminal Commands for Redirection
We now need to create a Dropbox folder and redirect it to our secure storage. We do this in Terminal - so, fire up Terminal - it’s in the ‘Utilities’ folder under Applications, or of course you can use Spotlight to locate it. Once you’ve fired it up, you’ll receive a screen like this:
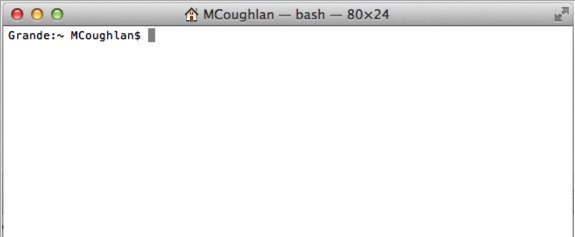
We are going to create a symbolic link that takes references to ~/Dropbox to your secure image instead. To do this, you need the command:
ln -s /Volumes/SecStore/ ~/Dropbox
NOTE: The SecureStore above must match the name of the volume you created earlier.
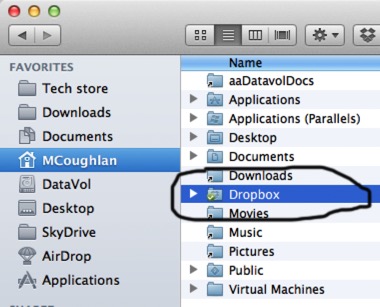
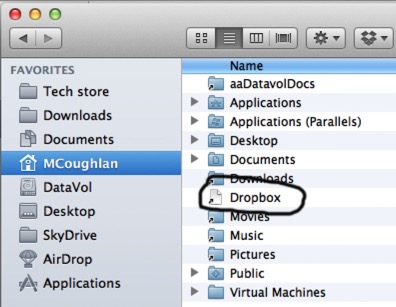
Once you’ve done the above, the Dropbox link in your home-folder will redirect to your secure storage. To check it, open Finder and have a look at the Dropbox folder - the icon should have changed to a link:
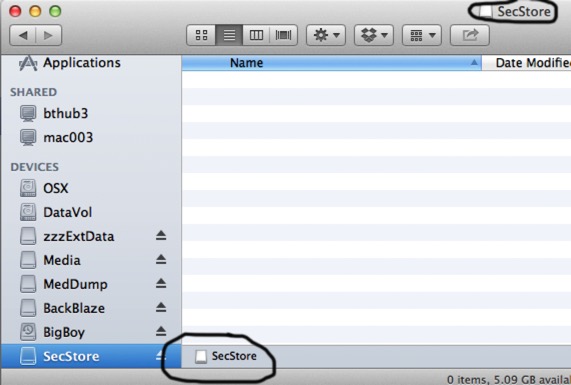
Also, selecting that folder should show in Finder that you’re really in the Secure Image store:
NOTE: If you have a lot of data, what you could do at this point is copy the data from the renamed folder we created earlier, into your new Dropbox store. This will cut down on synchronisation time for you.
Restart Dropbox
Now, use Spotlight to re-start the Dropbox client, and it should take you in to the initial setup again:
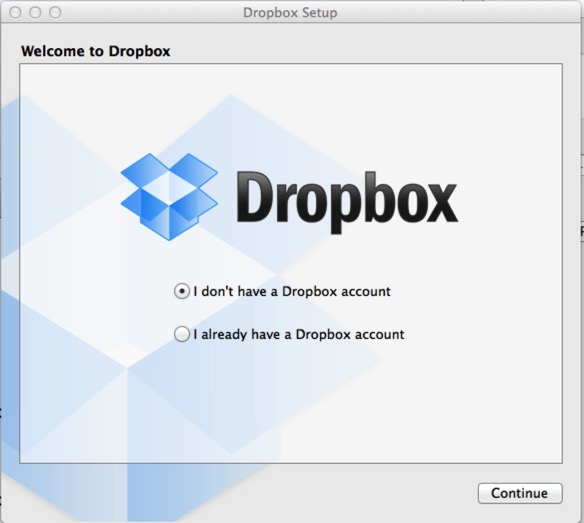
So login with your Dropbox account details by selecting ‘I already have a Dropbox account’. If you’re asked to install using previous settings you can do that - or you can continue with the full setup. Either method appears to work.
Cool hey? Now your data will synchronise into the secured image we created earlier.
Auto-Mounting the Secure Image
The other thing to consider is that you want your Secure Image to automatically mount when you login - otherwise, when Dropbox starts up you’ll see a message saying that the folder is missing. This is simple to do - go into your Preferences and select ‘Users and Groups’. In there, select your user account.
On the right hand side, select ‘Login Items’:
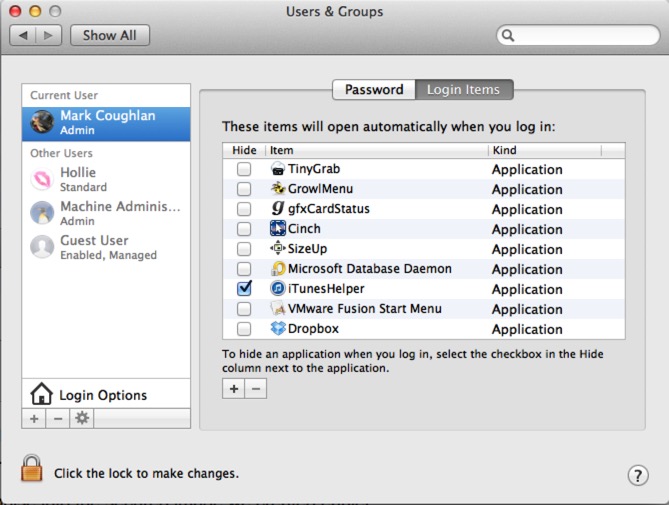
From Finder, go find your SecureStore image that you created earlier, and drag and drop it in to the login-items. That’s all there is to it.
Video Run Through
I’ve also done a video run through below that shows the same process - should help explain a little more what you’re achieving.
blog comments powered by Disqus