Lync 2013 Schema Update Methods
30/05/13 17:45 Filed in: Lync
Let’s look at how to update the Active Directory Schema for Lync 2013…and what it does in the process.
====
There’s a few different ways of performing a schema update to prepare for the implementation of Microsoft Lync 2013, so I thought it worth having a look at those wyas. Firstly, you can see a good overview of the whole preparatory set at this article:
Overview of Active Directory Domain Services Preparation
If you want to see what the schema extension actually does, have a look at this article:
Active Directory Schema Extensions, Classes, and Attributes Used by Lync Server 2013
Let’s look at the methods of update. The most obvious method is to use the Lync 2013 installer - it’s easy enough - however some people prefer to run schema updates on the schema master itself, and what if the schema master owner is a 32 bit domain controller? Well, you can’t then use the installer as that’s x64 - you’ll have to look at the other ways of updating. Also, to run the schema updates remotely, the DC holding the Schema Master role has to be running the ‘Remote Registry’ service - for details on how to do that, see this article:
How to Manage Remote Access to the Registry
So you can end up with the situation where you can’t run the native installer locally, as the domain controller holding the Schema Master isn’t x64 based, and you can’t run the native installer remotely as the Domain Controller housing the schema master isn’t running the ‘Remote Registry’ service. In those events, you’ll have to use other methods of implementing the schema updates. Another issue for example is what if you don’t have a machine that meets the minimum requirement of Windows 2008 R2 Service Pack 1 x64? Again, you can’t run the main installer, so you can’t use the deployment wizard to do the extension.
Anyway, let’s look at the various methods of achieving this schema update. We are going to look at three methods:
- Using the Lync 2013 Installer
- Using PowerShell
- Manually Importing
The last method of Manually Importing can be a godsend as it has less dependencies - you can import it on practically any domain controller/server without having to implement Dot Net, PowerShell 3, C++ etc. It will also work from 32 bit machines of course - if that’s what you’re looking for, jump down to ‘Importing the Schema Updates Manually’.
Before we have a look at how to do these updates - consider my lab environment. I have two servers, as follows:
- DC.contoso.local : Domain controller currently holding all FSMO roles.
- Member.contoso.local : Member server, running Windows 2008 R2, nothing else
Let’s assume we want to run all the schema updates remotely, and not on the schema master itself. Also, let’s assume our user has the relevant rights - it has to be a member of ‘Schema Admins’ and have Administrative rights to the Domain Controller housing the schema master.
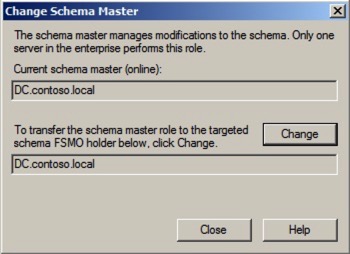
Also, how do you determine which server is the holder of the Schema Master role? Simplest way is to register the Active Directory Schema Plug-in, and then have a look in that console:
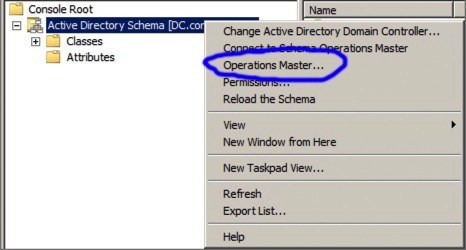
This will then tell you which unit is hosting the Schema Master FSMO - in my case, DC.contoso.local.
So let’s run through each option in turn.
Using the Installer
When to use this method: You have a Windows 2008 R2 SP1 or above x64 member server available, and remote registry services are running on your Schema Master FSMO.
Pre-Reqs: Logged in as a member of Schema Administrators, Remote Registry is running on your DC hosting the Schema Master Role, you have DOT Net 3.5.1 and DOT Net 4.5 installed on the server, and PowerShell 3.0. For Pre-Reqs for all roles, see: System Requirements for Servers Running Lync Server 2013 under ‘Additional Software Necessary for All Roles’. Note that the correct Powershell v3.00 install for Windows 2008 R2 is WINDOWS6.1-KB2506143-x64.MSU. Also, make sure you have the Remote Administration Tools for Active Directory installed.
Let’s run through the process of completing the schema update using the Microsoft Lync 2013 Installer. Attach/put the DVD in to your chosen x64 server - remember you need to be logged in as a member of ‘Schema Admins’. The very first thing you’ll get is a prompt to install the Visual C++ Libraries - so click Next to let that install. That bit shouldn’t take long at all.
Next, the installer will ask where you wish to place the installation files - you can accept the defaults here by clicking Install. You will eventually get to the main deployment wizard - and at the top you will see the option to ‘Prepare Active Directory’.
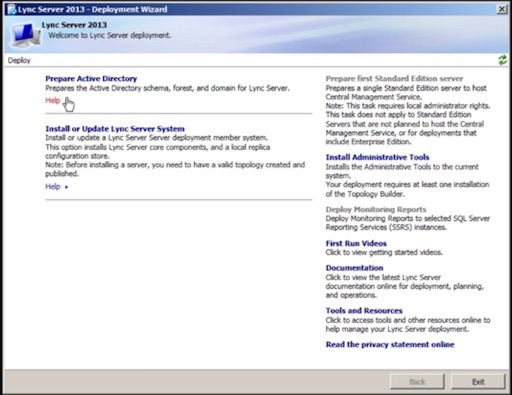
Selecting that option takes you in to the Prepare Active Directory menu - the option you want to select is ‘Prepare Schema’ at the top.
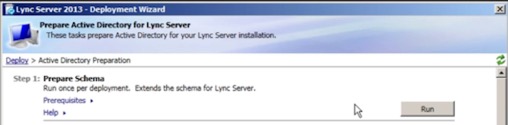
Note that if any of the pre-reqs are not met, you’ll get a red error message here telling you so - the small drop down will also tell you what the pre-reqs actually are:

When you hit Run, it will fire up the Schema Extension program - hit Next to continue with the update. When it’s finished, it will present an output box and in that output box you will see the path to the log file detailing the operation - it’s usually in the Temp Directory.
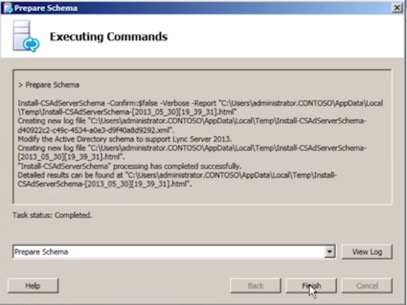
Firing up the log file will give you full detail of the whole operation.
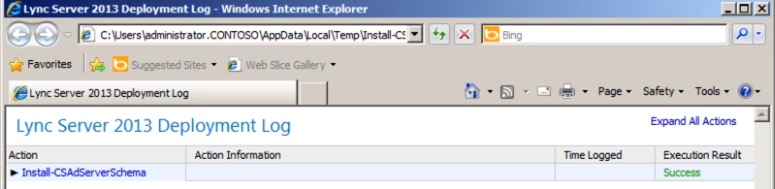
You can then click-through to see further detail on the implementation. At this point - you’ve completed your schema update.
This video here shows the whole process from start to finish.
Using PowerShell
When to use this method: You have a Windows 2008 R2 SP1 or above x64 member server available, and remote registry services are running on your Schema Master FSMO.
Pre-Reqs: Logged in as a member of Schema Administrators, Remote Registry is running on your DC hosting the Schema Master Role, you have DOT Net 3.5.1 and DOT Net 4.5 installed on the server, and PowerShell 3.0. For Pre-Reqs for all roles, see: System Requirements for Servers Running Lync Server 2013 under ‘Additional Software Necessary for All Roles’. Note that the correct Powershell v3.00 install for Windows 2008 R2 is WINDOWS6.1-KB2506143-x64.MSU. Also, make sure you have the Remote Administration Tools for Active Directory installed.
In reality, this method has the same real dependencies as running the main installer, so I’m not sure why people would want to use this method directly - but let’s run through it anyway. Attach/put the DVD in to your chosen x64 server - remember you need to be logged in as a member of ‘Schema Admins’. The very first thing you’ll get is a prompt to install the Visual C++ Libraries - so click Next to let that install. That bit shouldn’t take long at all.
Next, the installer will ask where you wish to place the installation files - you can accept the defaults here by clicking Install. You will eventually get to the main deployment wizard - once you see that, you can exit out of the deployment wizard as we won’t be using that to do any of the work.
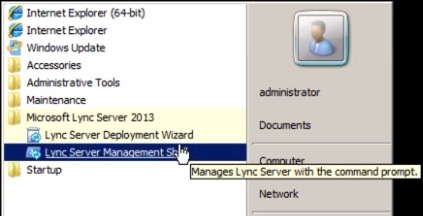
Instead, fire up the Lync Server Management Shell - you’ll find it on the start menu now.
You’ll see the PowerShell environment now appear. You can use the following command to check the state of the schema prep:
If the schema isn’t prepared for Lync 2013, you’ll see a return like this:

Once it is prepared, the return will change to SCHEMA_VERSION_STATE_CURRENT.
To extend the Active Directory Schema, use the following PowerShell Command:
You won’t see much of an output from that, so it’s worth running the get-csADServerSchema when it’s finished to confirm the state of play:
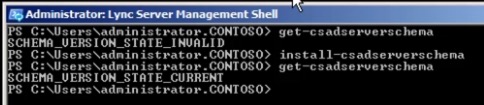
The above shows the initial check, the extension, and then the final check. Easy isn’t it? The video below shows a complete run through of this method.
Importing the Schema Updates Manually
When to use this method: When you have a 32 bit machine and you wish to run the schema updates; when implementing the pre-reqs on a qualifying machine is undesirable.
Pre-Reqs: Logged in as a member of Schema Administrators. Also, make sure you have the Remote Administration Tools for Active Directory installed.
With this method we can import the schema update directly to the Active Directory schema without using the deployment tools - this means there’s less pre-reqs to meet (such as Dot Net etc.) and also means we can carry out the process on 32 bit machines.
To carry out the update, firstly, grab a copy of the schema LDF files from the installation media - they are located under \Support\Schema. Copy the whole Schema directory for your C: drive. There should be these files in that directory:
- ExternalSchema.ldf
- ServerSchema.ldf
- BackCompatSchema.df
- VersionSchema.ldf
Note the ordering - that’s the order that we need to import the files in.
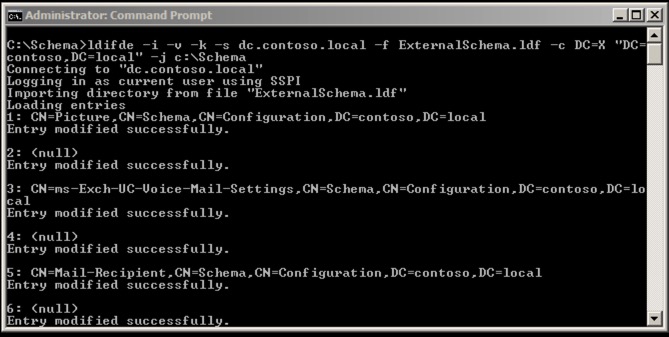
Next, drop out to a DOS Prompt and switch to the schema directory. You’ll need to import each of the files in turn, using the following commands:
- ldifde -i -v -k -s dc.contoso.local -f ExternalSchema.ldf -c DC=X "DC=contoso,DC=local" -j c:\Schema
- ldifde -i -v -k -s dc.contoso.local -f ServerSchema.ldf -c DC=X "DC=contoso,DC=local" -j c:\Schema
- ldifde -i -v -k -s dc.contoso.local -f BackCompatSchema.ldf -c DC=X "DC=contoso,DC=local" -j c:\Schema
- ldifde -i -v -k -s dc.contoso.local -f VersionSchema.ldf -c DC=X "DC=contoso,DC=local" -j c:\Schema
You will need to modify the items in italics to your environment. Also, if you need to authenticate with a different user, you’ll need the -b option - you can see all the options for LDIFDE here:
Using LDIFDE to import and export directory objects to Active Directory
The outputs will look similar to this:
Bear in mind the log will always be called LDIF.TXT so you may want to take a copy between each command. Also, don’t be too worried if you see an error file produced - have a look in it, and you should see something similar to this:
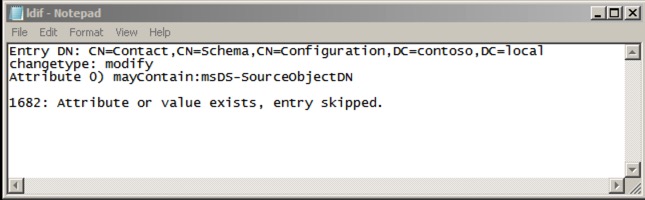
It’s just telling you some values already existed.
So it’s fairly simple. The video below runs through the whole process.
blog comments powered by Disqus