Skype for Business Click to Run
You can also use Click to Run to off-line deploy Skype for Business 2015/2016, whether Basic or full fat. Let's have a look how.
====
1 November, 2015: Quick qualifier - if you want to deploy Lync 2013 or Skype for Business 2015, use the Office 2013 Deployment Tool. Office 2016 Deployment tool for Skype for Business 2016.
====
Following my previous blog on Office 2016 Click to Run deployments, I've had a few emails asking whether you can deploy JUST Skype for Business in the same way. Well, yes, yes you can. It's pretty easy really. Firstly, the key thing is to know the ProductID that you want to install. You can get all that info here:
Product IDs that are supported by the Office Deployment Tool for Click-to-Run
You'll see in that article a breakdown of all the potential product IDs for the Office Deployment Tool to use:
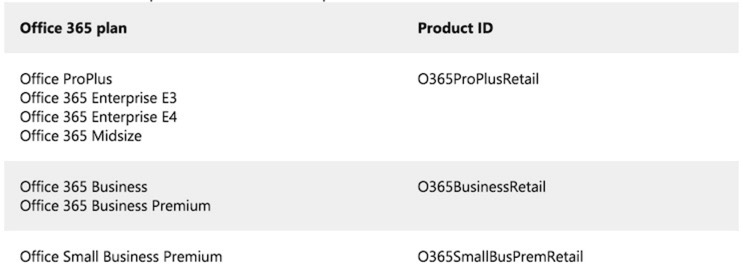

So let's look at the process, assuming we wanted to install the 'Skype for Business Basic 2016' client.
Get the Office Deployment Tool
Firstly, go get the Office 2016 Deployment Tool. You can get it here.
Office 2016 Deployment Tool
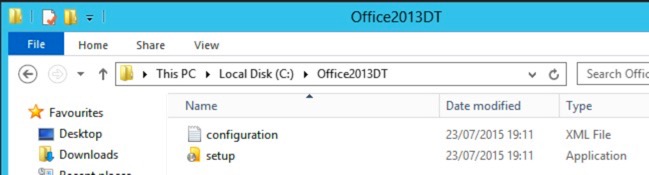
When you have downloaded it and execute it, you'll be asked to extract it to a directory. Make a directory and extract it to that - In my lab, I've put it in 'C:\Office2016DT'. You should see something like this:
Modify the XML
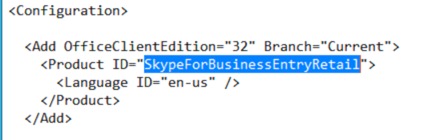
We need to modify that 'configuration.xml' so that it contains the products we want. Open it up, and you'll see the important bits here:
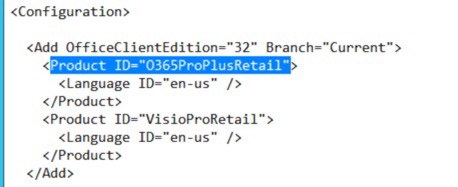
Modify the Product ID to that of the product you want to install - in this case 'SkypeforBusinessEntryRetail'. Note that we also don't want VisioProRetail installing - so delete that section between

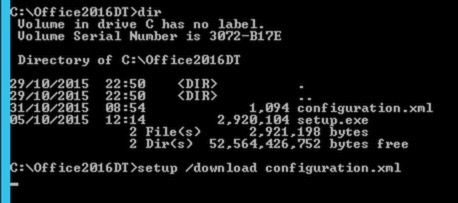
Download the Source Files
Next, we're going to grab the source files. To do this, open up a command prompt and go in to the directory containing the Office Deployment Tool, and use this command:
Setup /Download configuration.xml
This will download the source files to the current directory.
This can take a while to download, so just let it run.
Run the Installation
Now we're ready to go. It's real easy to install the client - just use this command:
Setup /Configure configuration.xml
If it's on a remote network share you'll need to include the UNC paths or map a drive - say for example you want to deploy to multiple machines. You can also set it up in Group Policy to auto-deploy.
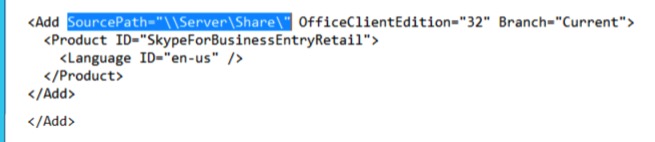
Note that in some scenarios I've seen you have to specify the source path in the XML. So for example assuming current directory the product line looks like this:
If you wanted to add an explicit source path for the source files then you would simply modify it like this:
Pretty easy stuff right?
Run the Installation
The CTR stuff is pretty easy to manage and deploy - it's worth a small amount of time to work out how the XML works and what you can do with it. Don't forget there's an awesome online XML builder too, see here:
Configuration XML Editor
You'll see there's an awful lot you can do with it.
Also, have a look here too - lots of good information:
Deployment scripts for Office 2016
The video below runs through the whole process.
blog comments powered by Disqus