Accessing Apple HFS Volumes from Windows
How can you access HFS+ Drives from a Windows PC.
====
I was recently reminded of an article I wrote a fair while ago explaining how to gain access to Mac OSX Volumes (HFS+) from a Windows machine. Apple provided the drivers with their Boot Camp package, so it's really just a matter of extracting the drives and installing them on your Windows machine directly.
Firstly, some caveats:
- You play with storage drivers at your own risk, obviously. I've done this on all of my Windows machines - and have done for a few years - and they've been fine.
- Now, one thing to be aware of is that the drivers are read-only. If you need read/write, you'll need a product like Paragon HFS+ for Windows.
- The drivers do not support the legacy Apple Partition Map. If you need that, you'll need a product like Paragon HFS+ for Windows.
If you plug in an HFS+ Volume into a Windows machine without the drivers, you'll get something similar to this:
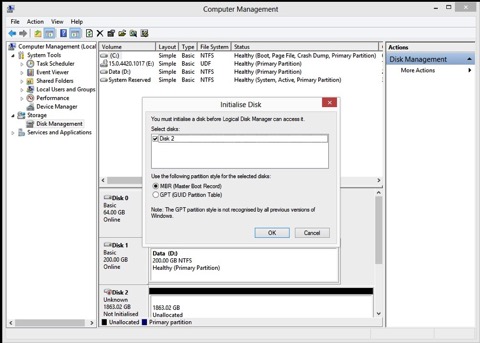
…which isn't great. The drives can't be read. Make sure you don't click OK on the above, it'll ruin your day.
So let's run through the process of installing the Boot Camp Disk Drivers.
You can install the drivers directly on a Windows 7 or 8 machine pretty easily. If you just want the disk drivers, you can get those here:
Boot Camp Disk Drivers
Download, and extract them to your machine. You'll be left with a folder called AppleHFS, with contents like this:

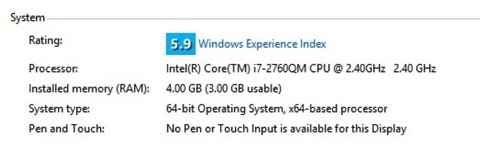
Now, you need to know if you have a 64 bit or 32 bit installation of Windows - if you're not sure…then you probably shouldn't be doing this! The easiest way to check is get the properties of 'My Computer' - you can see on my test machine I'm using a 64-bit operating system.
If you have a 64 bit machine, copy the contents of the 64 Bit folder to:
%systemroot%\System32\Drivers
If you have a 32 bit machine, copy the contents of the 32 Bit folder to the same location.
...for example, you would copy AppleHFS.SYS and AppleMNT.sys to:
C:\Windows\System32\Drivers
Note you will probably have to provide administrative privileges to copy to that location.
Next, we need to set some registry keys. I've put together a small registry import file called 'RegDrivers.REG'. The contents are as follows:
======
Windows Registry Editor Version 5.00
[HKEY_LOCAL_MACHINE\SYSTEM\CurrentControlSet\services\AppleHFS]
"Type"=dword:00000002
"ErrorControl"=dword:00000001
"Start"=dword:00000000
"Group"="File System"
[HKEY_LOCAL_MACHINE\SYSTEM\CurrentControlSet\services\AppleMNT]
"Group"="System Bus Extender"
"Type"=dword:00000001
"ErrorControl"=dword:00000001
"Start"=dword:00000000
======
Simply double-clicking on the Reg file will result in a prompt asking if you want to import the settings. Say yes, and the import will be confirmed. You'll now need to reboot your machine.
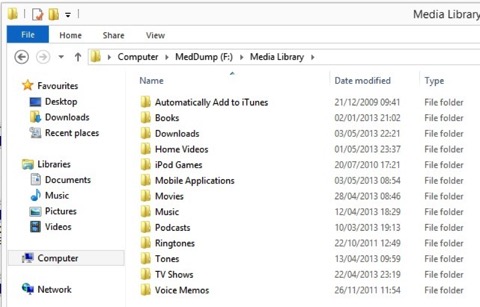
Once your machine is backup you should now be able to see your Mac drive:

…and:
In Disk Management you'll see the partition type showing up as HFS:

Cool hey?
If you want to remove these drivers from your machine, firstly remove these registry keys:
HKEY_LOCAL_MACHINE\SYSTEM\CurrentControlSet\services\AppleHFS
HKEY_LOCAL_MACHINE\SYSTEM\CurrentControlSet\services\AppleMNT
…and then delete the AppleHFS.sys & AppleMNT.sys from the Drivers directory too - you will need to reboot your machine at that point too.
I've also done a video below showing the whole process - below, or you can see it in hi-def glory here.
=======
Incidentally, the latest BootCamp driver set description for Windows 7 & 8 is here:
Boot Camp Support Software 5.0.5033
…or you can download directly from here:
Boot Camp Support Software 5.0.5033
=======
blog comments powered by Disqus