Yeah, that’s a silly, clickbaity headline. I’d never write something like that. WAIT.
Had a chat with a mate today — he’s a techy — about which chip to go for in his next MacBook. We went back and forth, compared specs, workloads, all that jazz. End result? He ordered a fully-loaded M4 Max MacBook Pro. Gangnam Style.
That convo got me thinking about modern Apple Silicon. Specifically, what you really get when you go all-in on the Max.
I’ve been daily driving a MacBook Air M4 (10-core CPU/10-core GPU/1TB), even though my main workhorse is a fully-spec’d M4 Max MacBook Pro (16-core CPU/40-core GPU/64GB RAM). And you know what? The Air is impressively good. I’m typing this on it right now — on low power mode — and it’s sailing through everything.
Let’s talk numbers:
👉 MacBook Pro — £4.2KGBP
👉 MacBook Air — £1.4KGBP
Big price difference. And yet… in day-to-day use? Not a huge gap.
Office apps, Remote Desktop, browsing, notes, light creative work — all feel the same. Seriously. But surely the Max must do something better, right?
Definitely. It wins in two areas:
👉 Speed — How quickly it chews through big tasks.
👉 Scale — How much I can do at once before things start lagging.
Not general responsiveness. That’s basically the same on both.
Speed sounds obvious, but it’s nuanced. Regular apps don’t push either machine, but batch export a few hundred 120MB RAW files from Lightroom? The Air does it (which is nuts in itself), but it’s noticeably slower. The Max flies through the job while I carry on doing other things.
Same deal with 4K video editing in Final Cut Pro. Editing is fine on the Air. Exporting is where the Max shines — especially with complex timelines.
Does it matter if an export takes 10 minutes or 30? Depends. If you’re doing it daily for work, then yeah, time is money. Otherwise? Probably not a big deal.
Scale is where the Max really stretches its legs. I can be exporting video, running Windows in Parallels, editing docs, tweaking photos — all at once — and the Pro just handles it. That’s the power of more RAM and more cores. The Air hits memory limits way before CPU limits from what I’ve observed so far.
How often am I doing all that simultaneously? When I’m in work mode — sure. But for general use? Rarely.
Truth is, the current Apple Silicon chips are phenomenally capable. Yeah, benchmarks show big leaps between M1 → M4, but in real-world use, most software hasn’t caught up. Outside of AI and Large Language Models, do we need this much power in a laptop? Maybe not.
Still, I know I’ll be eyeing the M5 Max Turbo Nutcase the second it drops.
There are practical differences too. My Pro runs three external 27″ monitors — the Air can’t. That matters to me. But otherwise? There’s not much I can’t do on the Air that I can only do on the Max.
Let’s talk Intel. I’ve got a Samsung Galaxy Book 5 Pro 360 — one of my favourite Windows laptops. Great battery life, and pretty decent performance… if it’s plugged in. Unplug it, and performance drops off a cliff. Classic Intel trade-off.
MaxTechOfficial just did a video comparing the M4 Air vs a new Intel Lunar Lake Zenbook S14:
Now look, MaxTech is basically sponsored by Cupertino, even if they pretend not to be. But still, the battery and performance gap is real. Intel’s still chasing.
No tidy wrap-up here, just a musing: maybe we’ve reached a point where hardware is sprinting ahead, and software needs to catch up.
Oh, and my video just finished exporting on the Air. While writing all this. Bonkers really. My old i9 MacBook Pro would’ve lit the desk on fire by now and probably have tried its best to crap its fans out.
I’ve done a bit of a derp, and it’s taken me way too long to work out such a simple derp. I use physical keys for logon to my MacOS devices, as well as passwords. I’ve been setting up a new MacBook Air today, and could I get my YubiKey to work?
I’ve factory reset it, I’ve been through the pin setups, all the certificates I configured manually and everything checked out – but could I get it to pair? Absolutely not. I was expecting the normal pairing prompt when you plug the device in:
SmartCard Pairing
I’m sure several of you are laughing already.
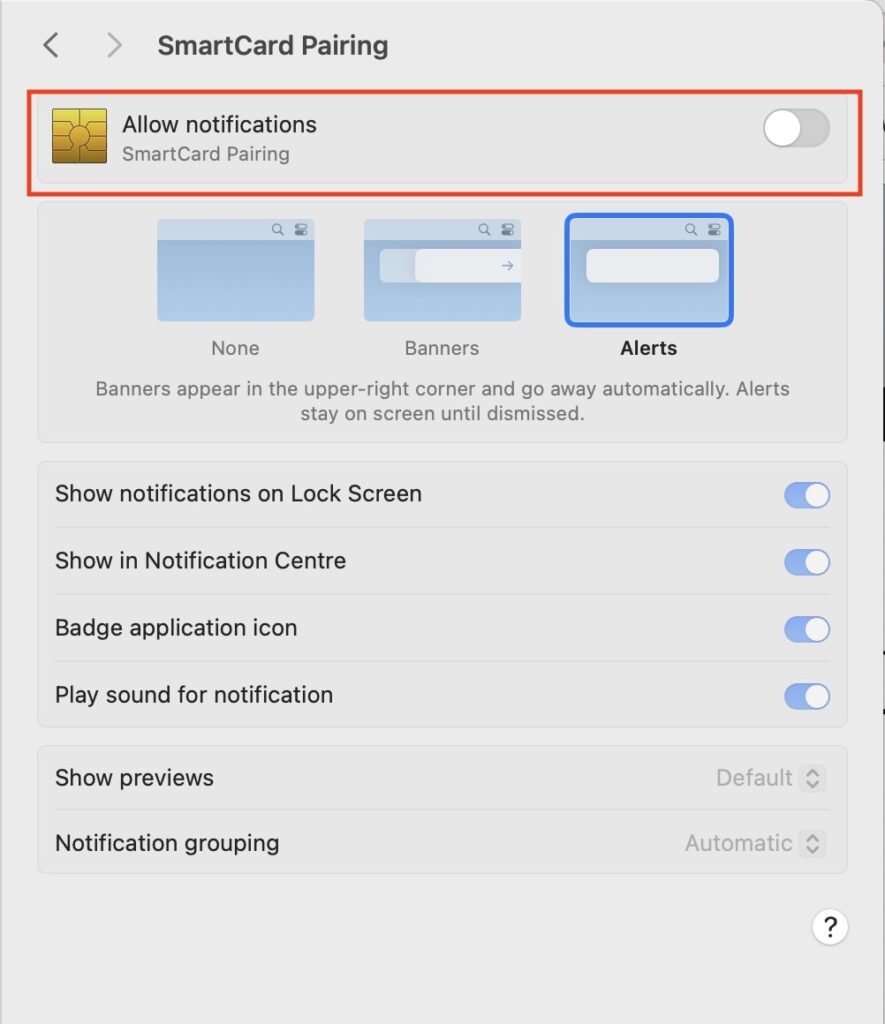
Try as I might, everything looked good, nothing worked. Why am I not getting the SmartCard pairing notification?! WAIT. Notification. Let’s check our MacOS notification configurations in Preferences:
SmartCard Pairing Notifications
Yeah, notifications were turned off. That’ll be it then. Somedays it’s the simple things that get you – and on those days I’m pleased I don’t operate heavy machinery.
This is quick addenda to my previous post on the PST Import Service. Sometimes you can run in to an issue where the import service says it cannot find the PST files – something like ‘The PST could not be found in the storage account’.
You can view the storage blob created during an import session – it’s a quick/handy way to be able to see why the import service is having the problem.
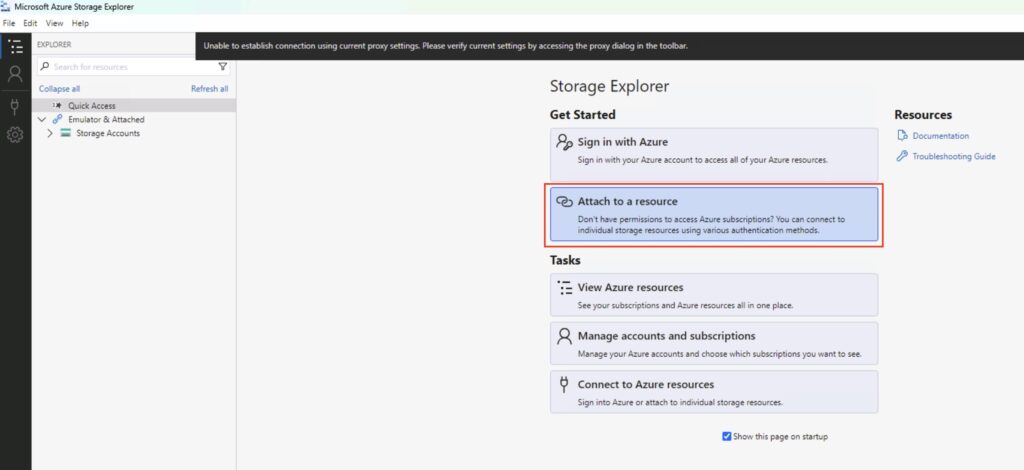
It’s pretty easy. Download and install the ‘Azure Storage Explorer’ from here:
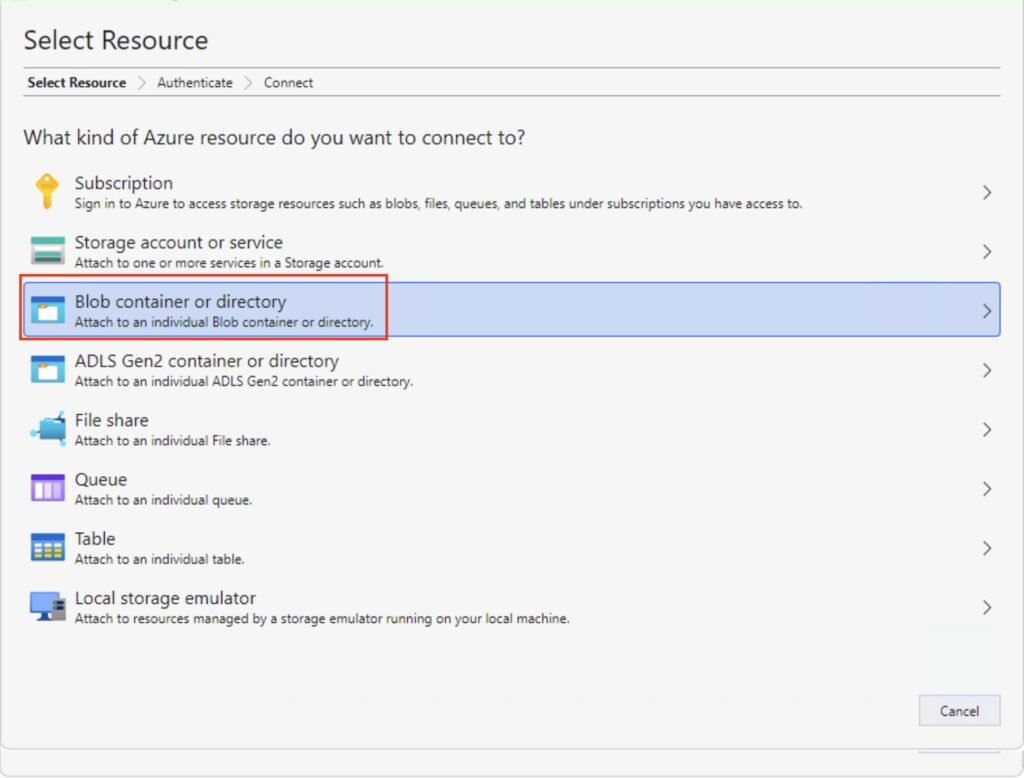
You now need to select ‘Blob container or directory’.
Select the blob
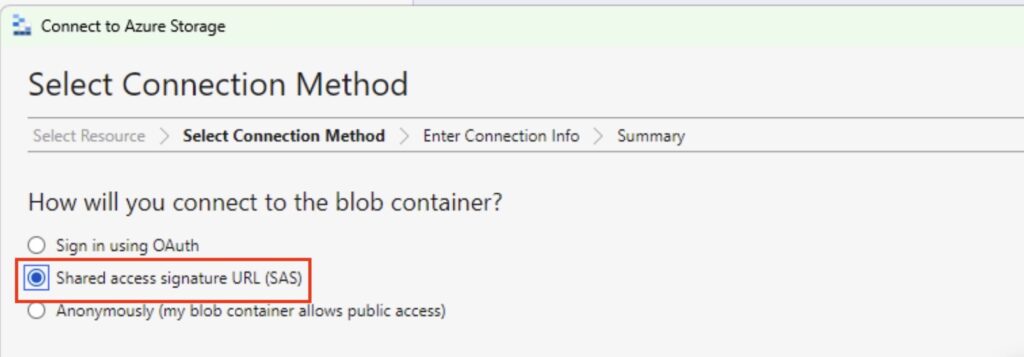
Next, select the ‘Shared Access Signature URL (SAS) option’:
SAS
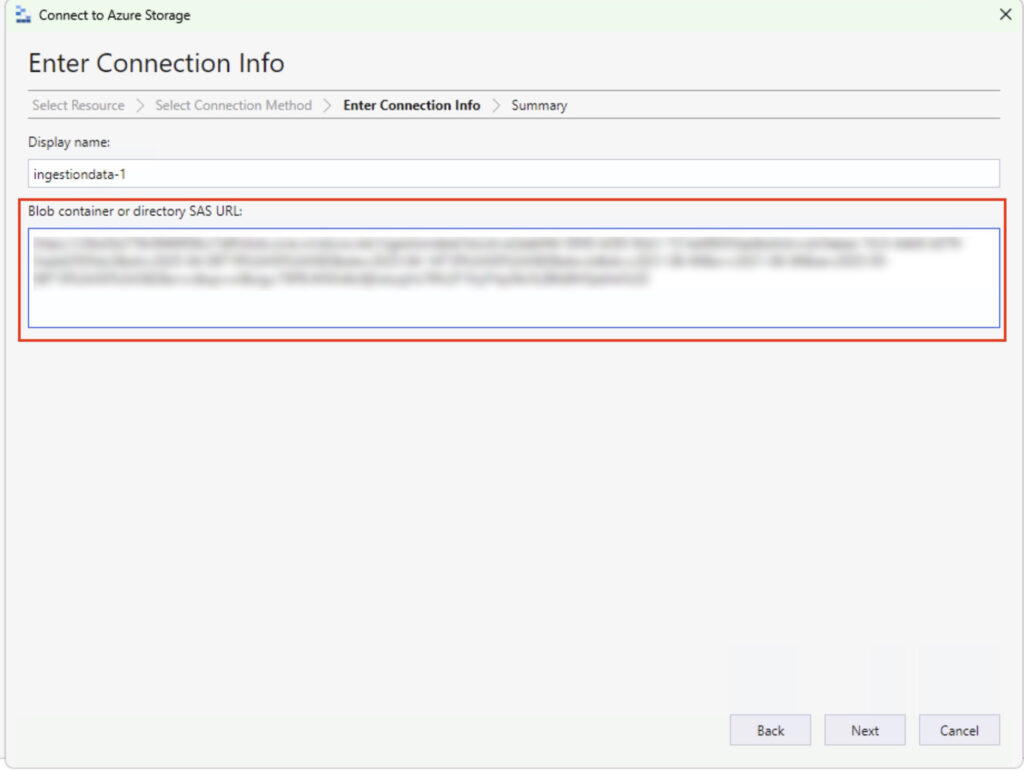
Now, paste in the HTTPS link to your blog – don’t worry about the display name, it will self populate:
Paste your blob
Click ‘Next’ and good things will probably happen. You’ll get a summary – which is good – followed by a ‘Connect’ button, which, if you’ve gotten things right, will also be a good thing:
Blob View
In the above you’ll see:
1: How I learned about the sub-folders meaning nothing works.
2: The PST files we have imported as part of this demo.
3: The PST file I’m currently running for an actual real person.
What the PST Import Service does is allow you to bulk-copy PST files to Azure and have Microsoft import those PST files to mailboxes – primary mailbox or to the online archives – to your mailboxes. It’s a very useful service, and I’ve lost track of how many times I’ve used it over the years. It’s also very easy to use – so let’s run through the process.
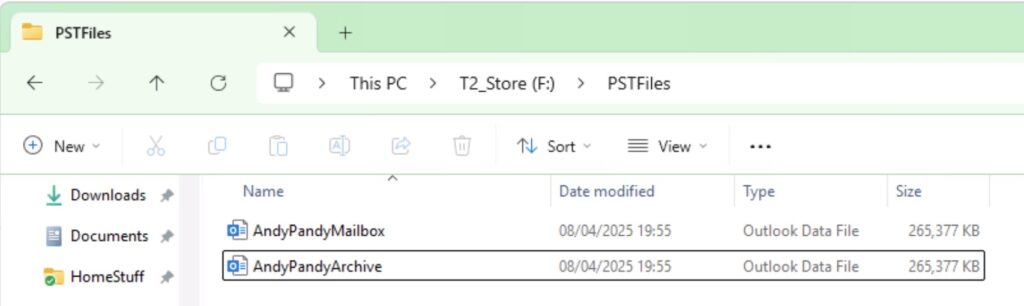
For the purposes of this demo I have a single user – Andy Pandy – and a couple of PST files. One I want land in his primary mailbox, and one I want to land in his archive:
PST files to import
You Need the Right Permissions!
This is a common issue when trying to use this service – the user you’re going to use for this must be assigned the Mailbox Import Export role in Exchange Online. What’s annoying is that while this is quick to add to a user, it’s slow to apply. You also need to be assigned the Mail Recipients role. By default, this role is assigned to the Organization Management and Recipient Management roles groups in Exchange Online.
I usually as an early on task create a role group that has the relevant rights – adding members to the group applies the permissions far faster than applying them to individual users.
Find the Import Service
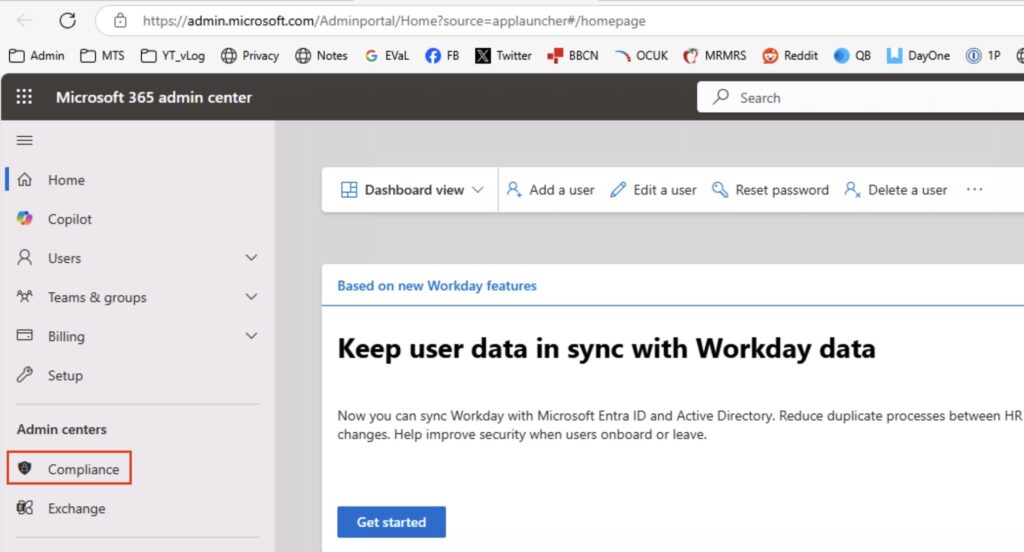
I’ll take you through the whole process. Firstly, logon to Microsoft 365, and go to the Admin Centre. You need the Compliance portal – or Purview.
Compliance Admin Center
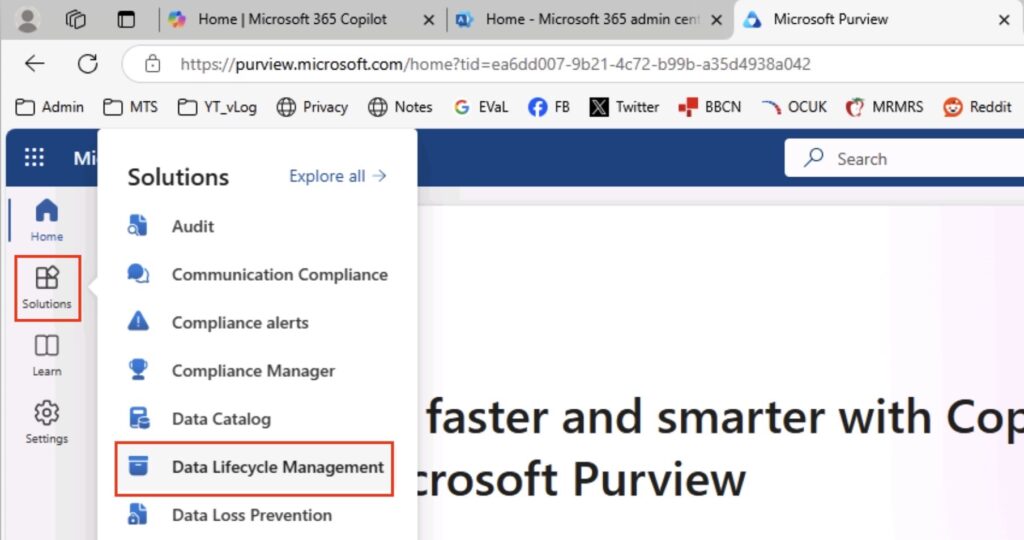
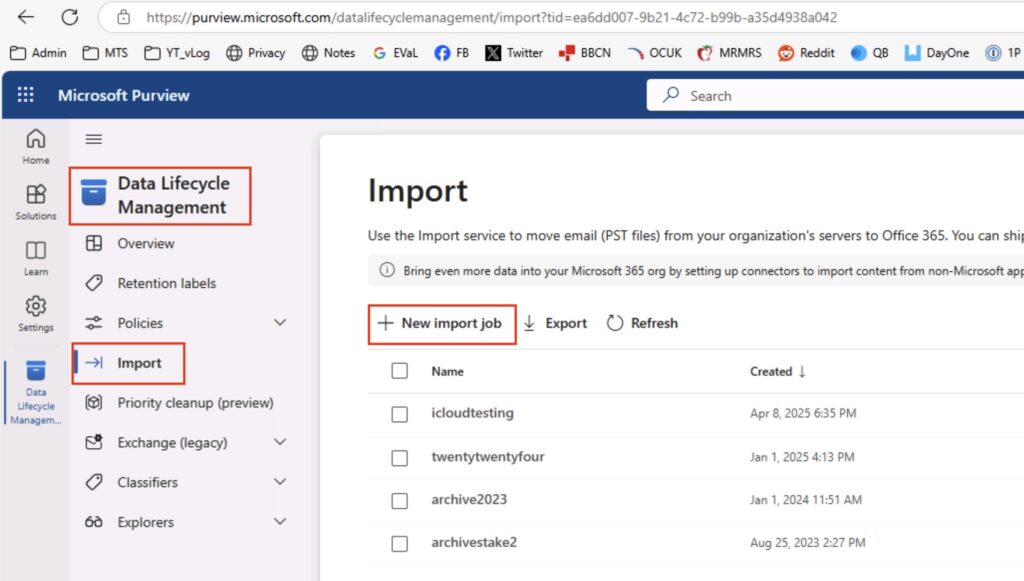
I’m going to assume that you’re using the new admin portal rather than the classic – the option is still easy to find in the classic portal however. The option you want to select is ‘Solutions’ in the left-hand menu bar, followed by ‘Data Lifecycle Management’.
Data Lifecycle Management
Create a new Import Job
In that area, you will now see on the left the option to select ‘Import’ – do that, and the ‘+’ next to the ‘New Import Job’ in the menu – we’re going to start an import. You’ll see that I have several jobs in there already.
DLM: Import Process
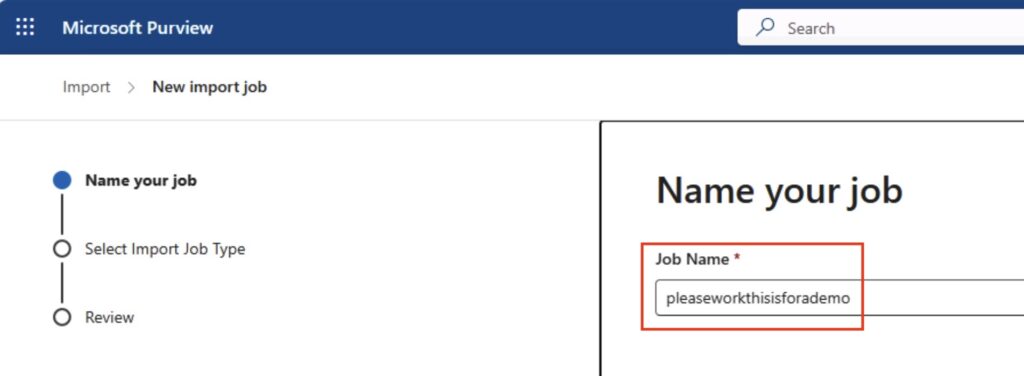
The first thing you will need to do is name your job. It’s quite fussy on the naming:
Job Name: 2-64 lowercase letters, numbers or hyphens, must start with a letter, no spaces
You can see that I have given mine a suitable demo name:
Name your job
Click ‘next’ right down the bottom of the screen – be careful with this, if you can’t see it, expand your browser window! It doesn’t always auto-scale, which can be irritating.
Selectyour import type
Next, we’re going to choose to upload our data. You can ship physical drives to Microsoft, however I’m not going to cover that process here. Select ‘Upload your data’, and click ‘next’ at the bottom.
Select your job type
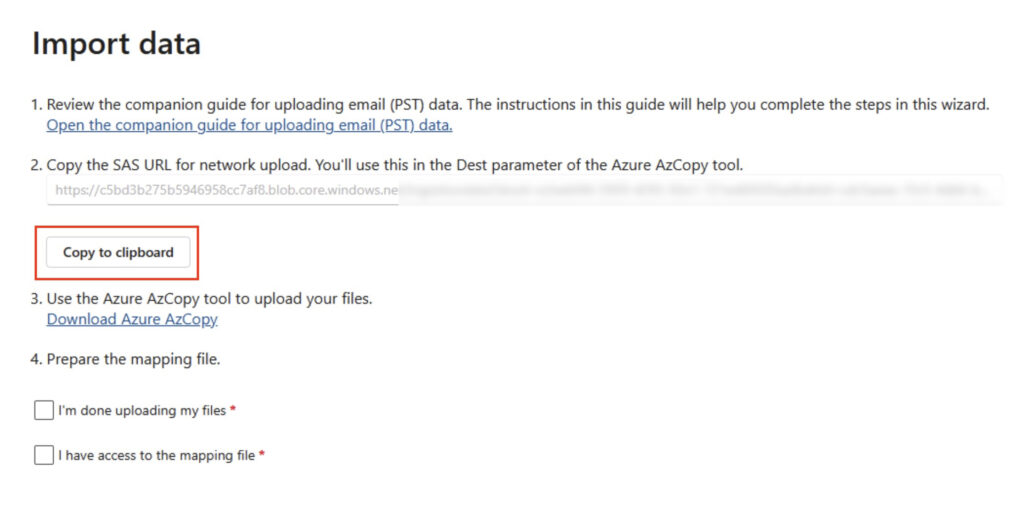
Import Data
This is the interesting bit, and it can be quite fussy so you must be accurate with this items!
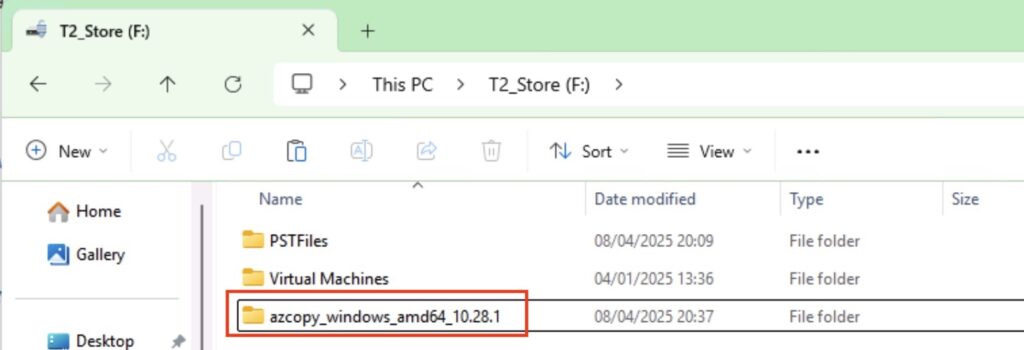
You will first need to download the ‘Azure AzCopy’ tool. You can get it here:
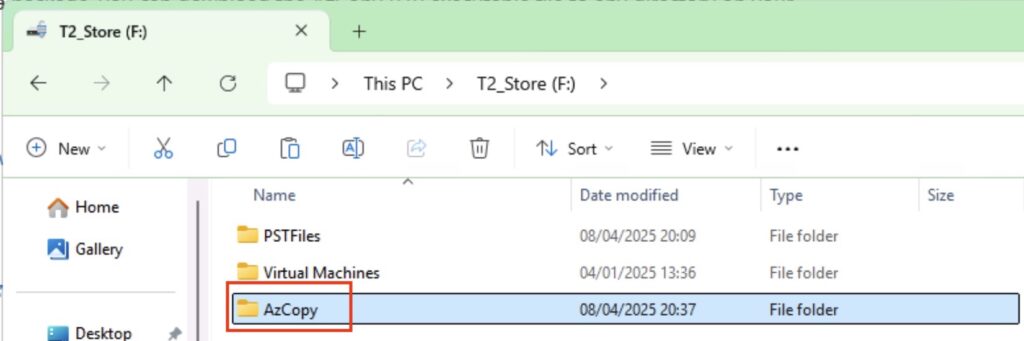
There are significant changes between earlier versions of AzCopy and later ones in terms of command line options, so I’m going to assume you have downloaded the latest version (as of 2025-04-08) and we’ll be using that. We’ll be doing this from the command line, so I tend to rename the directory after I’ve expanded it to make it easier – you can see below the original, and where I have renamed it:
AzCopy ModuleAzCopy Folder Renamed
Let’s Copy Our Data!
So let’s form our AzCopy command – fire up notepad as this may take you a couple of goes to get right ☺️ The command you want is:
NOTE: Make sure you put the target blob in quote – it often has syntax impacting characters in it that will cause you problems.
Let’s formulate the full command. What’s my ‘SourceDirectory’ – In my example, my PST files are in ‘F:\PSTFiles‘. So my source is ‘F:\PSTFiles\*“. The format with the trailing * is important! If you just do ‘F:\PSTFiles’ then you’ll end up with a folder called ‘PSTFiles’ and a complaint saying “the service cannot find your files – “The PST could not be found in the storage account” or similar.
Next, the ‘TargetBlob’. You get this by clicking on the ‘Show Network Upload SAS URL’:
SAS URL
After a moment or two, the URL will be generated, and you will see the option to copy the URL to the clipboard – do that, and paste it into Notepad.
SAS URL Copy to Clipboard
So we now have the source and the target, so let’s formulate our command based on:
I’ve randomised the blob, so don’t even think about it 🤓 The item on the end ensure files can be overwritten if you get the command wrong and nee do re-run. You can see why I suggested copying it into Notepad.
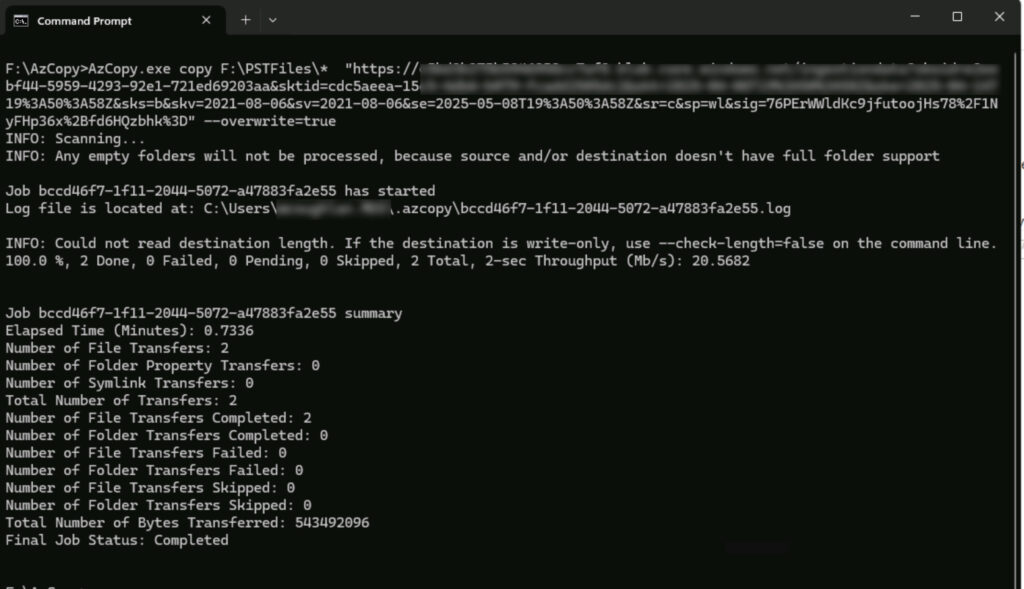
We now have our command, so let’s execute the copy. Fire up a DOS prompt, and go to the directory containing our AzCopy. Then, simply copy/paste in the command we have created above.
AzCopy Execution
Hopefully you’ll see your files have been copied, and at a decent throughput too! I can often exhaust my 1Gbps connection so it doesn’t appear to be highly throttled.
Prepare the Mapping File
Next, we need a CSV file that maps the various PST files to the right mailboxes and the location in that mailbox. You can download my example for this demo from here:
NOTE: Case is important for both the PST file and the Email Address. That second one surprised me – I don’t remember that being the case. I now copy the email from the Admin centre (for one or two accounts) or grab via PowerShell.
Mapping File
Upload the Mapping File
We have the mapping file, and we’re ready to continue. Select ‘I’m done uploading my files’ and ‘I have access to the mapping file’, followed by ‘Next’:
Ready to upload the mapping file
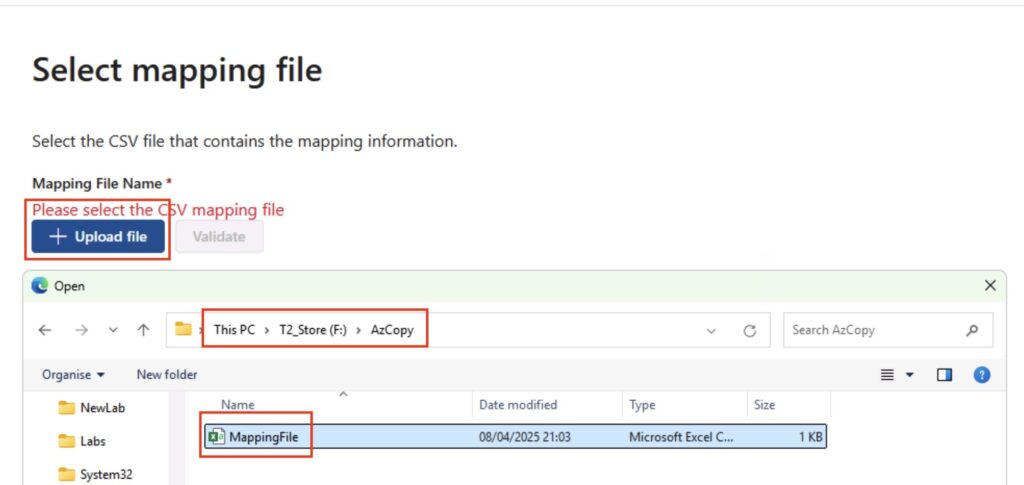
You will now be asked to upload your mapping file – hit that button, and select your mapping file:
Mapping File Upload
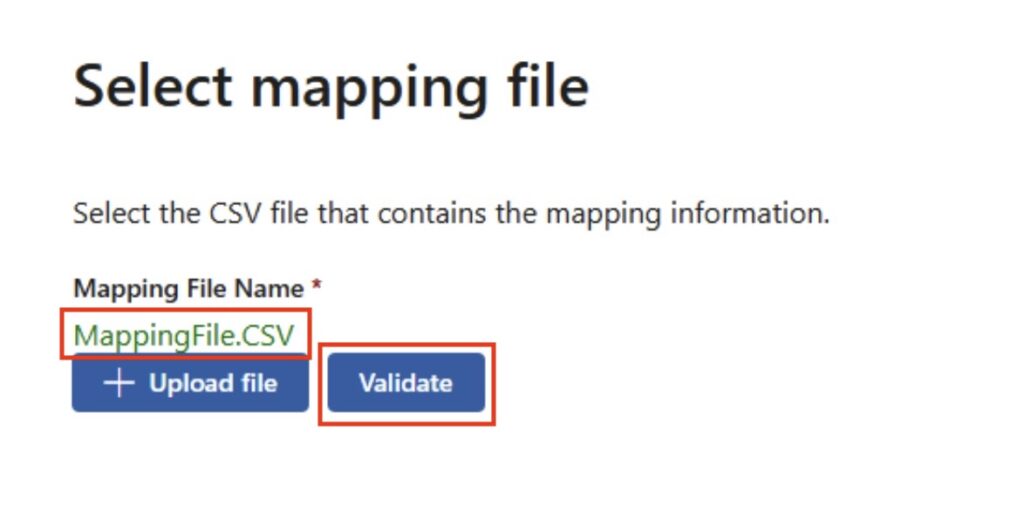
Once you have uploaded the mapping file, you will want to hit ‘Validate’ – it will check for common errors:
Mapping File Validation
Hopefully, your mapping file will show up green as in the above example. The most common error I see is ‘The PST could not be found in the storage account’ – this is because you’ve uploaded the directory, not the individual PSTs! Refer back to including the ‘*’ in the source path. You can of course include the path in the mapping file however I find that in itself can be quite fussy – stick everything in the root and you’ll be fine.
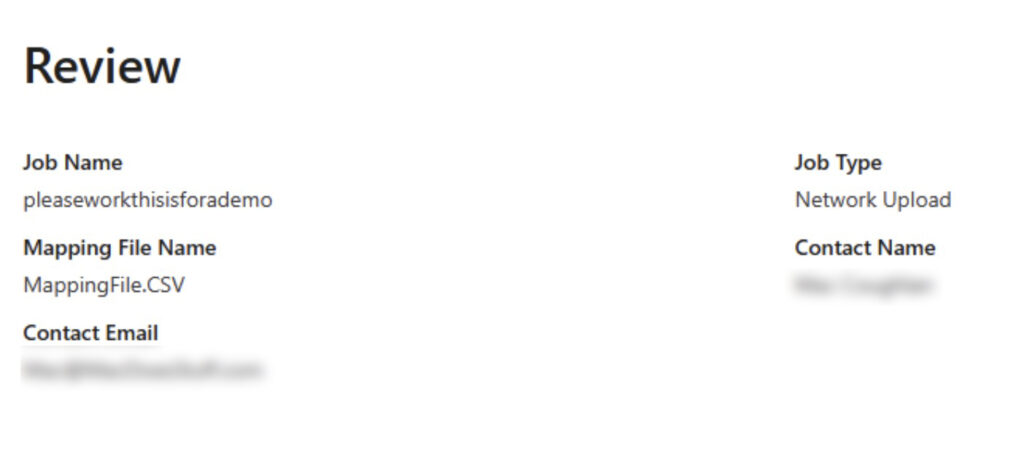
Assuming you’re all good – click ‘Next’. You will now receive a summary/review of the import job you have just created – you can click ‘Next’ on this one too, assuming everything looks OK.
Review of the import job
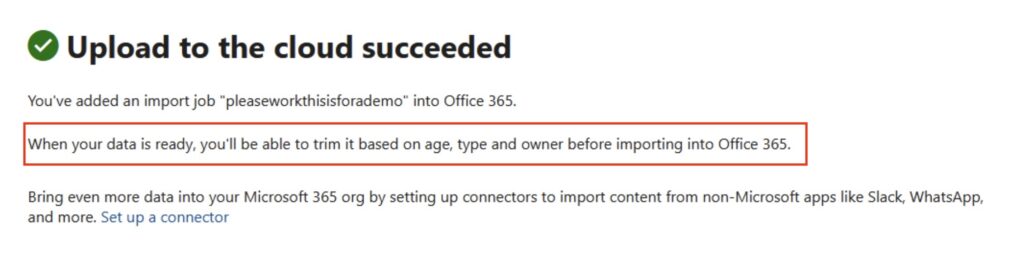
Click ‘Submit’ at the bottom. The Import Service will now examine the PST files – it has not yet started the importing!
Upload to the cloud succeeded
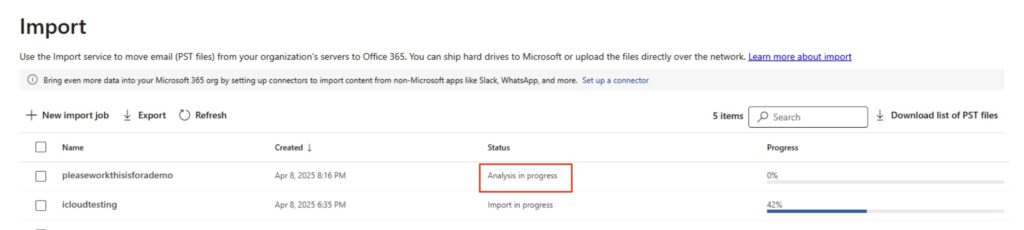
Click ‘Done’ and you will be taken back to the import screen – you will need to wait for the analysis phase of the import job to complete. Depending on the number of PST files and their size, this can take a little while.
Analysis in progress
Import Completed (Oh no it isn’t)
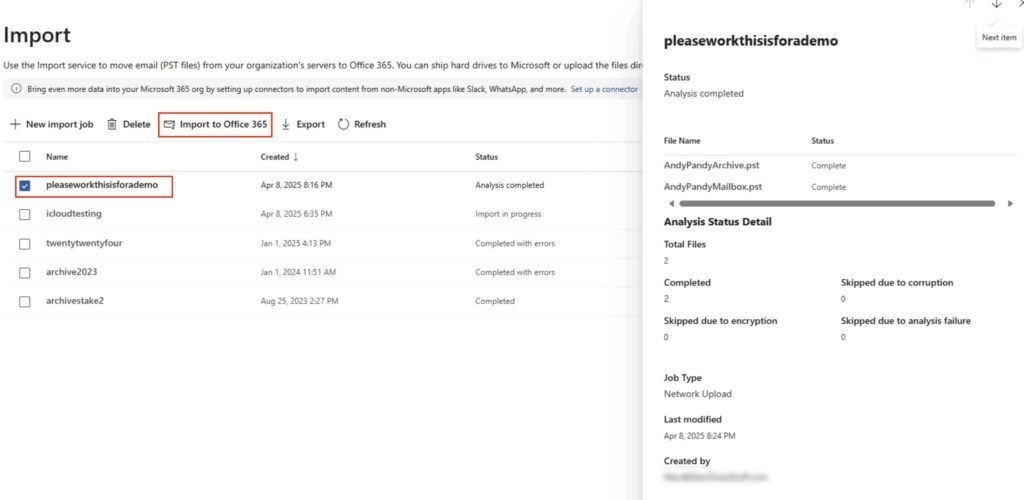
After a while, the import job will change to ‘Import Completed’ – don’t be fooled by this, the Import itself has NOT been done yet. Honest.
Import Analysis Completed
You want to select the job and make sure that the files have completed – none have been skipped etc. When you’re happy, hit that ‘Import to Office 365’ button. Interesting given it’s just said the import is done, right?
Import State
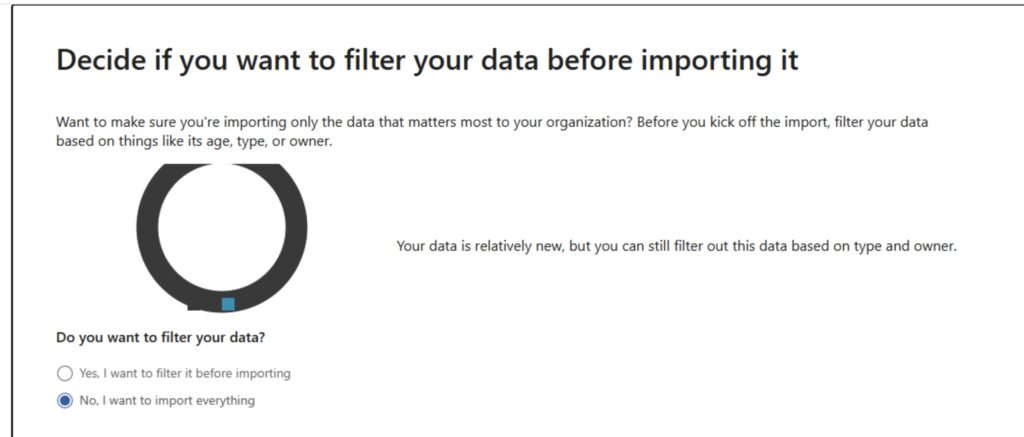
Filter Data
You can now, if you wish, filter the data. I’m not going to for the purpose of this demo however you can say for example to not import data over 2 years old.
Filter your data
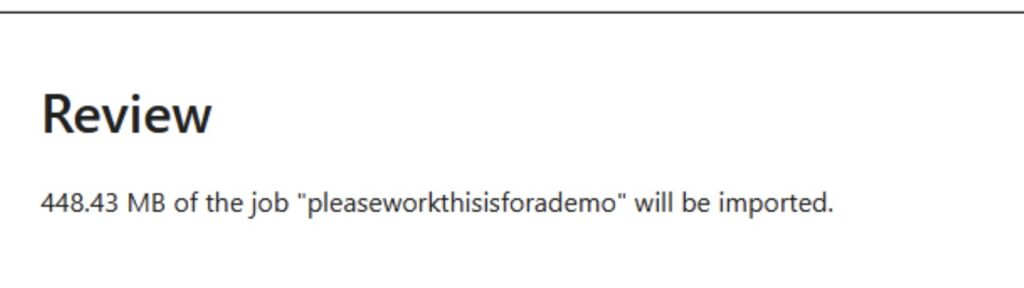
Click ‘next’ after you have selected the right option for you. You’ll now be told what the import job is going to do.
Review of import
See now the cool stuff can start. Hit ‘Submit’ and hopefully off it will go!
Derp
Hopefully, off it goes! Once the job is going properly, you can monitor its progress:
Derp
How Fast Is It?
I find it sometimes difficult to fully ascertain overall ingestion performance for Microsoft 365. Trying to keep up with the developing throttling situation is sometimes challenging. Saying that, you can carry out some reasonable guesswork.
I typically see about 20-30GB/day ingestion rates per mailbox, which is fairly decent.
Common Gotchas?
There’s the permission thing I mentioned at the beginning – it’s an irritant realising you need to do this only to realise you have to wait a while for the permissions to apply.
Message Sizing
There’s a 150MB message size limit in Exchange Online – you cannot therefore import messages that are larger than 150MB.
The Online Archive
The Online Archive initially is 50GB or 100GB, however it can auto-expand up to 1.5TB. There are several things to consider around auto-expanding archives however the most relevant one to this conversation is around ingestion rate – the fast ingestion rate only works up to the 50GB or 100GB limit (I.e., whatever the license limit is that you have). Beyond that, you’re relying on the auto-expanding process and that’s limited to circa 1GB/day. Also, in my experience, the Import Service fails when it hits that auto-expanding limit. I’d investigate other options if that’s your use case.
As a quick side-note, if you have complex migration requirements – multi-terabyte mailboxes, Symantec eVault migrations etc. – one of my favourite vendors is Cloudficient. They have some very cool technology to deal with these complex scenarios.
Summary
It seems a complex process when I write all this down – it really isn’t however. Like I say, I use this process a lot. Make sure you’re fussy on case etc. and you’ll find this a really useful tool.
The First Refusal: When “Good Enough” Isn’t Enough
Lately, I’ve been taking on more work after a period of downtime. And a few days ago, I experienced something new – my first refusal. Someone approached me with an opportunity, and I simply turned it down with a polite “thanks, but no thanks.” It wasn’t a tough decision, but I found myself reflecting on why I said no.
I’ve worked with this company before. They’re just 10 minutes from my home, and with the flexibility of remote work, I could do the job from anywhere. Still, my instinct told me it wasn’t the right fit. So, why the sudden refusal? After some thought, I think I’ve figured it out.
A ‘Favour’ vs. a True Partnership
One of the first things that didn’t sit right with me was the tone of the request. The person I spoke with seemed to have the attitude that they were “doing me a favour” by offering the work. It’s a subtle but significant shift in perspective. It didn’t make me feel valued, and that always raises a red flag for me.
But there was a more fundamental reason for my refusal. Although the company is fairly large—around 6,000 employees across multiple countries—their approach to technology felt stuck in a “good enough” mindset. On the surface, that might sound fine. After all, many companies aim to deliver just what’s needed to move forward. But my experience with this company made it clear that this was more than just a strategy; it was a way of operating that left me frustrated and unfulfilled.
“Good Enough” Doesn’t Cut It
I’ve often said that I struggle to know when something is truly “done.” It’s a fine balance between perfection and completion, and I sometimes lean too far into perfection. It’s not a humble brag—anyone who’s seen my dial plans will understand. I can sometimes spend too long on that last 5% of tasks to get them ‘just right’, and it’s not always necessary.
This company, however, had an organisational mindset that leaned far too heavily on “done but not perfect.” It wasn’t just an occasional occurrence; it was the norm. The approach was one of constant compromise, and that’s not a place where I thrive. What made it worse was their frequent boast about being under-budget on projects. Yet, they had large product support teams that seemed to go unnoticed—a case of neglecting the quality of the output while claiming to save money perhaps?
The result? A lot of patching over previous decisions that were made too hastily, leading to more work down the line. For an architecture role, it felt more like 60% architecture and 40% cleaning up past mistakes. Much of my time was spent deciphering old PowerShell scripts that were meant to “quickly resolve” issues. I remember the first time I used ChatGPT to summarise a script—it felt like I had found a godsend.
The “Test System” Debacle
One particularly memorable example was a core business platform upgrade. The team had run out of VMWare capacity, and they couldn’t wait for the upgrade timelines. So what did they do? They dropped the requirement for a Test System. While that might sound like a small change, the reality was that they had actually dropped the need for a live system. All users were now effectively working in the test environment. As you can imagine, chaos ensued.
This situation raises an interesting question: when do we hit the point of diminishing returns in terms of effort versus value? When is something “good enough”? We all set our own boundaries in these matters, but within organisations, some people have more influence over where those boundaries lie than others.
For me, that drive to finish things properly is essential. It’s not about making something “work”—it’s about making something work right. A job well done leads to a deeper understanding of the platform I’m working with, and it’s far more satisfying than merely “making it do stuff”.
The Impact of Mediocrity
The real issue with a “good enough” culture is that it leads to mediocrity. If you’re constantly being asked to deliver work that’s average, you start to deliver average work. This affects motivation and, over time, can feel demoralising. Mediocre work starts to feel like a norm, and it’s easy to slip into that mindset across a wider array of tasks. It feels defeating.
Another practical issue I encountered at this company was the constant requirement for unexpected, unplanned work outside regular hours. Incident management calls at odd hours were the norm. Now, I know correlation doesn’t equal causation, but after experiencing this regularly, I couldn’t help but notice the pattern.
The Hidden Costs of “Good Enough”
When we talk about the point of diminishing returns, most people focus on the practical side of things—the time, effort, and resources required to finish a task. I however think we often overlook the broader impact. What about the toll it takes on our work culture, our personal time, and even our self-esteem? Delivering “good enough” feels like accepting mediocrity, and who wants to settle for that?
Over time, this affects your confidence in your abilities, and that, in turn, shapes how much influence and success you can achieve in your career. Constantly being asked to settle for less doesn’t just impact the work—it impacts the worker.
In Conclusion
After some reflection, I can see why I turned down that opportunity. It wasn’t just about the work itself, but the company’s approach to delivering quality and the impact it had on their team. I’ve learned that striving for more than “good enough” isn’t just beneficial for the projects I work on—it’s essential for my own growth, motivation, and satisfaction.
Now, I think I’ll go have an argument with a PowerShell script. It’s been a while.